
TUTORIAL
02. Creating a search engine
On this page
- Create an account
- Creating a Project and Adding Members
- Creating an Instance
- Project View and Instance View
In this chapter, we explain the first steps to using KandaSearch, starting from creating an account to creating instances, which are the core of the search engine.
Create an account
To use KandaSearch, first, create an account to log in to KandaSearch. Account creation is free.
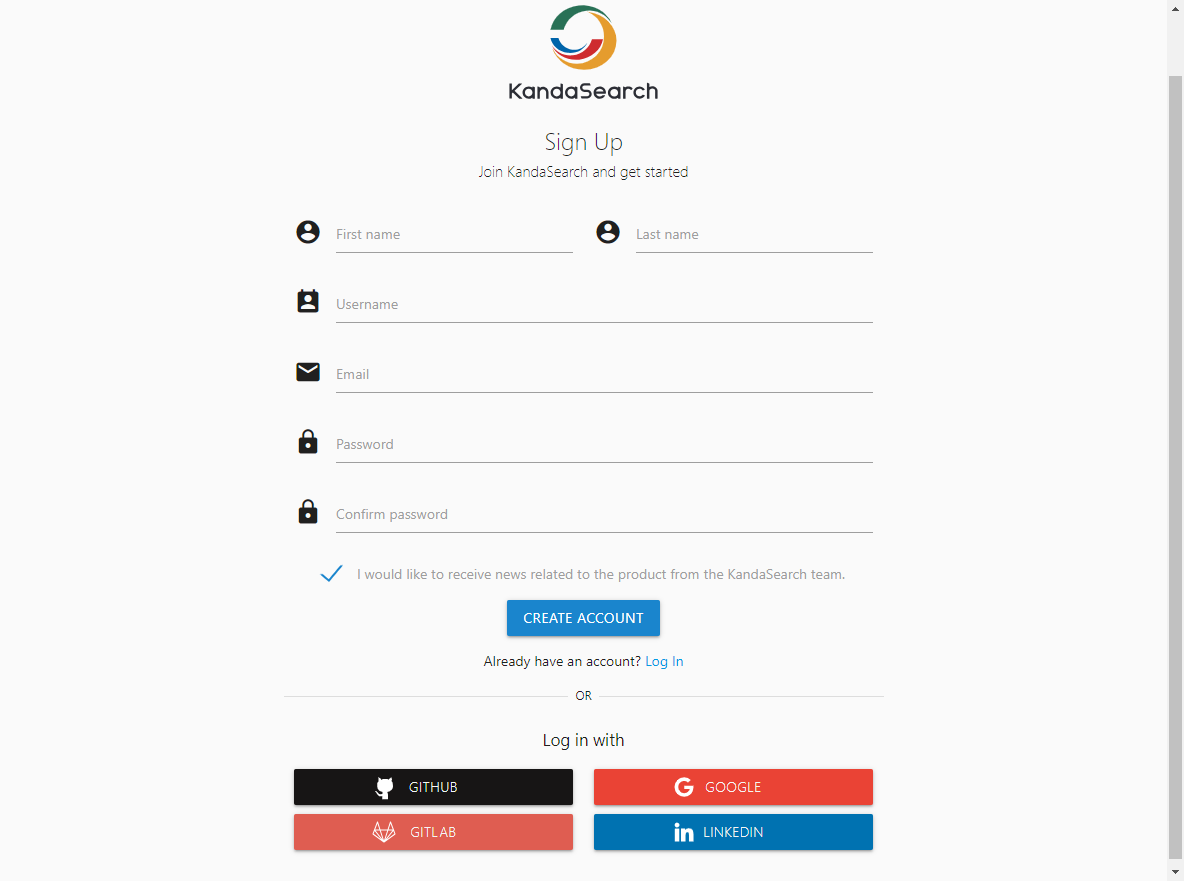
1 - Access the Top page of KandaSearch and click on 'SIGN UP' at the top right of the screen.
2 - At the signup screen, click on the globe icon at the top of the screen to change the display language to English.
Enter the following information and click 'CREATE ACCOUNT'. At this point, your account creation is not yet complete.
All fields are required.
- First Name
- Last Name
- Password
- Confirm password
- "I would like to receive news related to the product from the KandaSearch team." Check box (You can change it later so you won't receive it.)
Notes
- The password must be at least 8 characters with one uppercase and one lowercase letter, and one number.
- You cannot use a username that is already in use on KandaSearch.
- You cannot use an email address that is already in use on KandaSearch.
When creating an account or logging in, you can also use social login with GitHub, Google, GitLab, or LinkedIn.
3 - An email confirmation will be sent from KandaSearch to the specified email address. Clicking the 'Confirm Email' link in the email body completes the account creation process, and you will receive a registration completion email.
In the following tutorial, it is assumed that you are logged in to KandaSearch with the created account.
Creating a Project and Adding Members
Creating a project
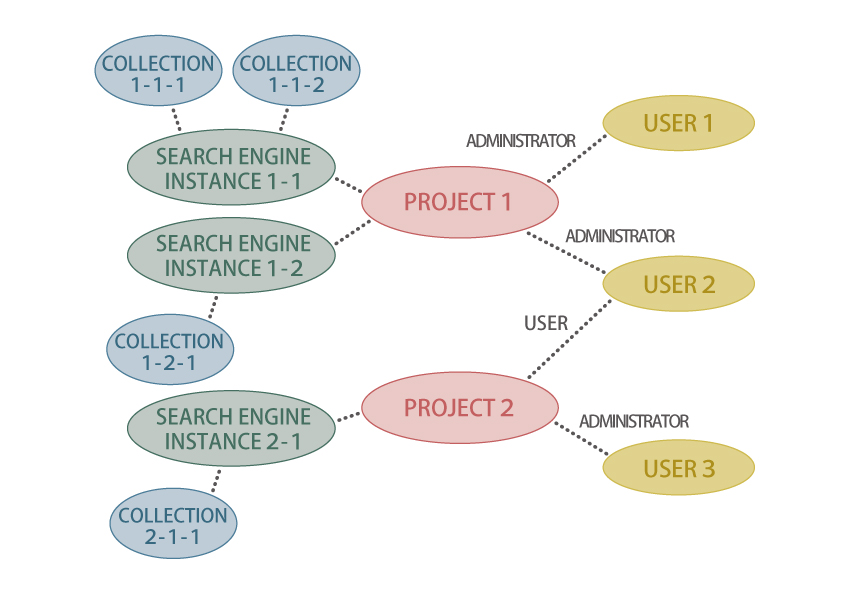
KandaSearch has a component called 'Project'.
In KandaSearch, 'Project' refers to a container for managing search engine instances and various objects.
The main items that can be managed within a project are as follows:
- Search engine instances
- Members (users belonging to the project. Users can participate in multiple projects)
- Backup
- Restore
- Web Crawler
- Billing Information
- Extensions
- Synonym Dictionary
The diagram below illustrates the relationship between the components of KandaSearch: Project, User (Member), Search Engine Instance, and Collection.
In a project, multiple members can be registered, allowing collaborative development and operation of KandaSearch's search engine while using it.
Users can participate in multiple projects and perform roles suitable for each project.
Let's create a project then.
To create a project, select 'Create a New Project' from the '+' icon displayed at the top of each screen.
You can also create one from the 'CREATE PROJECT' button within the project list screen displayed by clicking the KandaSearch logo at the top left of the screen.
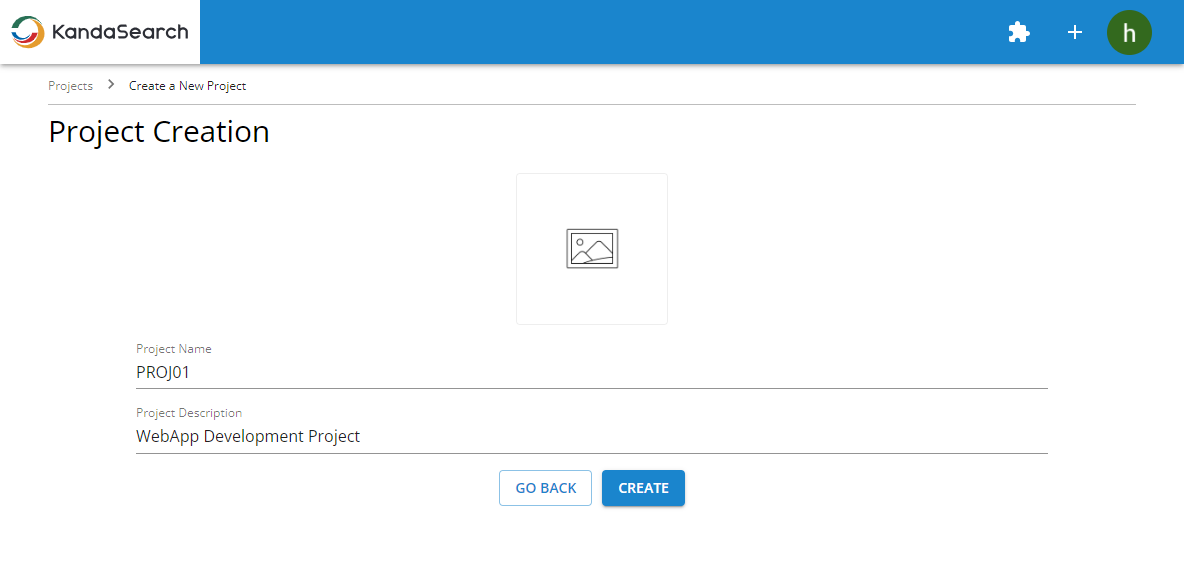
On the 'Project Creation' screen, enter the project name and project description (input is optional), then click 'CREATE'.
Clicking the picture icon above the project name allows you to set a project logo image. Choosing an original image for the logo may increase familiarity with the project.
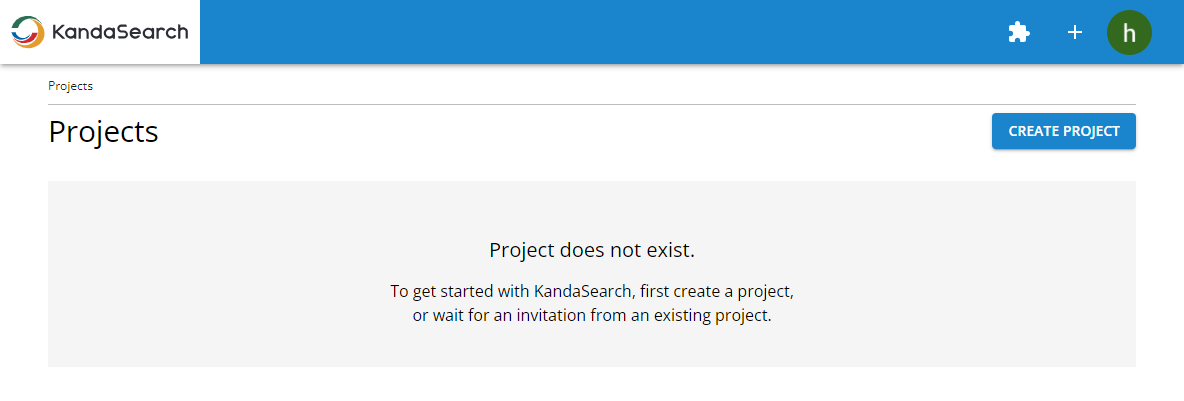
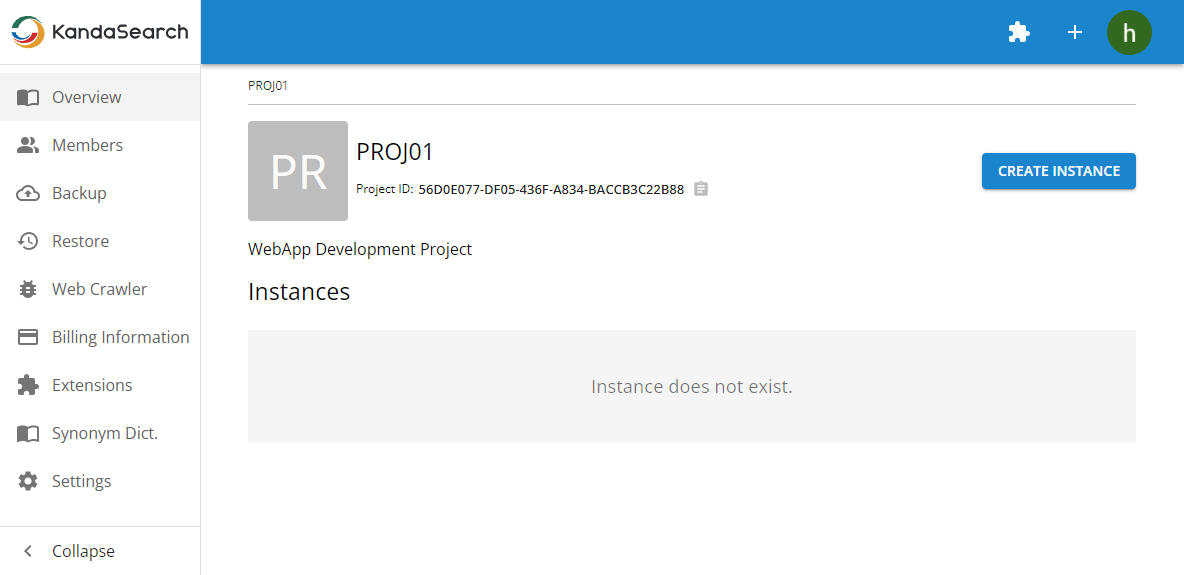
After the project is created, the screen will redirect to the project overview.
To view a list of all projects registered to your account, click the KandaSearch logo at the top left of the screen.
Add new member
Next, let's add members to collaborate on this project.
Click on 'Members' from the left side menu.
After clicking 'ADD NEW MEMBER TO PROJECT', invite members by specifying their email address and role.
When adding members, specify one of the roles: 'Administrator' or 'User'. This allows for appropriate permission settings for members, enabling safe project management by multiple members.
Please refer to the FAQ for the main functions available in the project for each role.
Creating an Instance
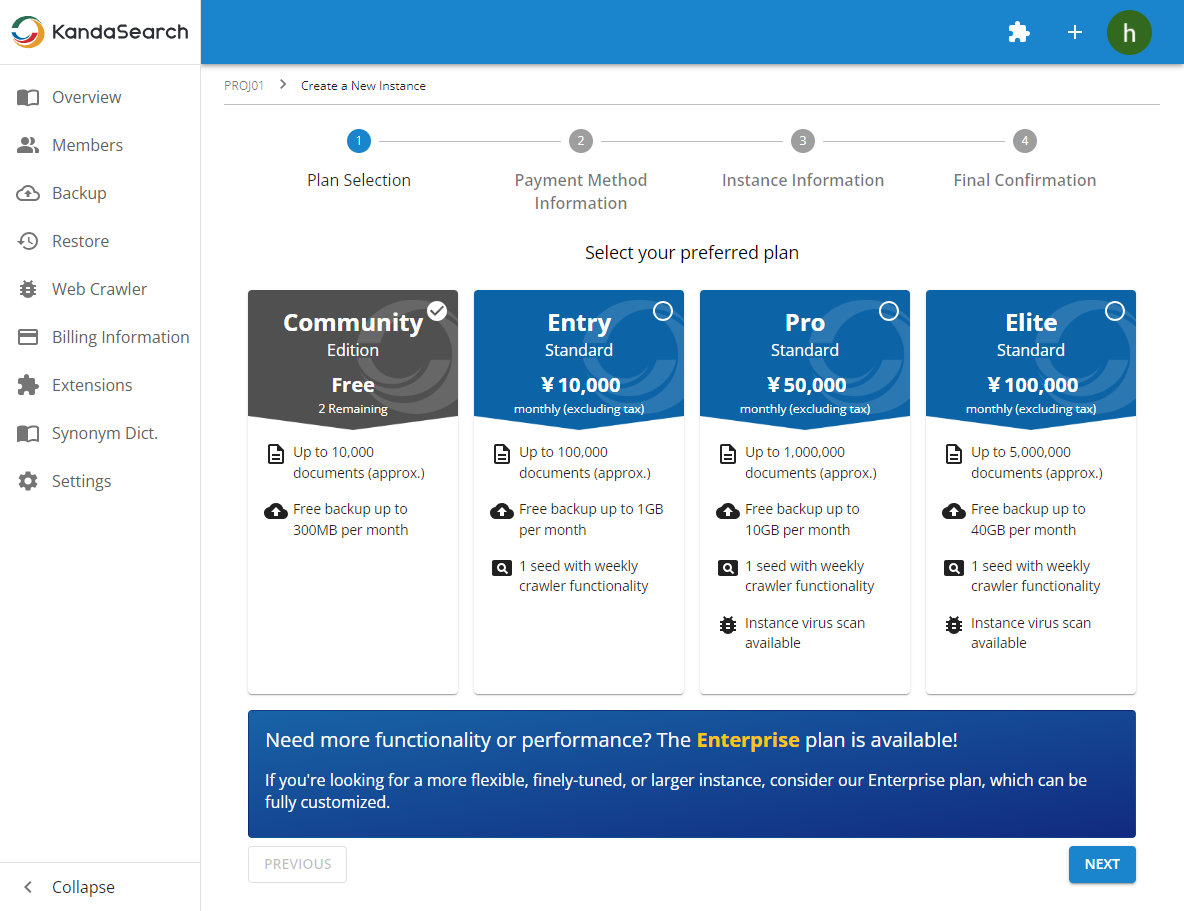
Next, create an 'instance', which is the core of the search engine. In this tutorial, we'll select the free community plan to create and use the instance. With the community plan, you can create up to two instances per project.
Confirm that the project overview is displayed.
If the project overview is not displayed, while logged into KandaSearch, click on the KandaSearch logo at the top left of the screen. Then, click on the desired project name from the project list.
Select 'Create a New Instance' from the '+' icon displayed at the top of the screen, or click on 'CREATE INSTANCE' at the top right of the project overview screen.
Step-1
At the 'Plan Selection' screen, choose 'Community' and click 'NEXT'
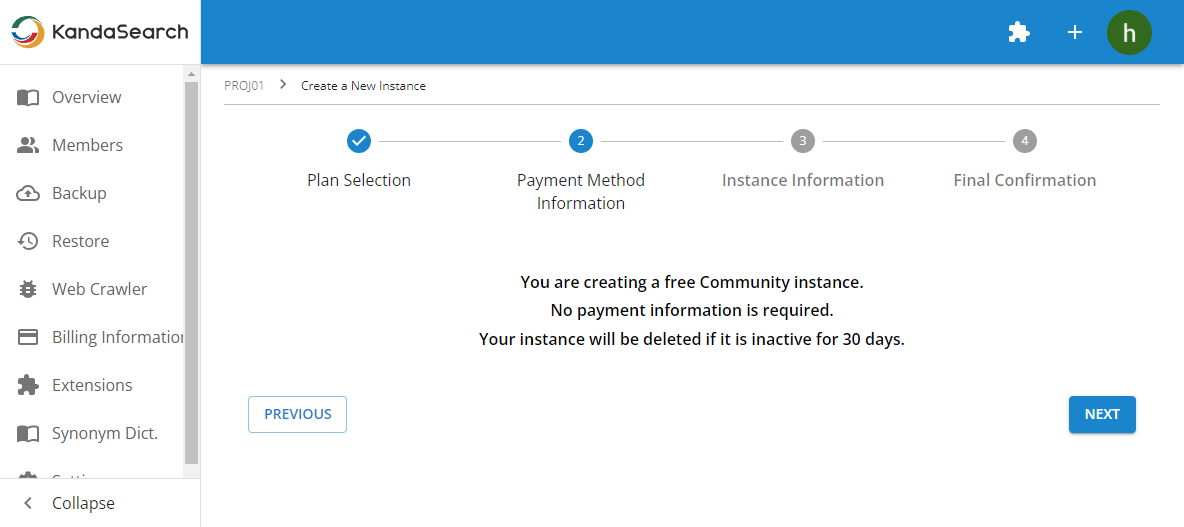
Step-2
At the 'Payment Method Information' screen, payment-related information will be displayed. If the information is not registered, instructions for entering various information will be displayed.
Since we are using a free instance this time, there is no need to register payment information.
Click 'NEXT'.
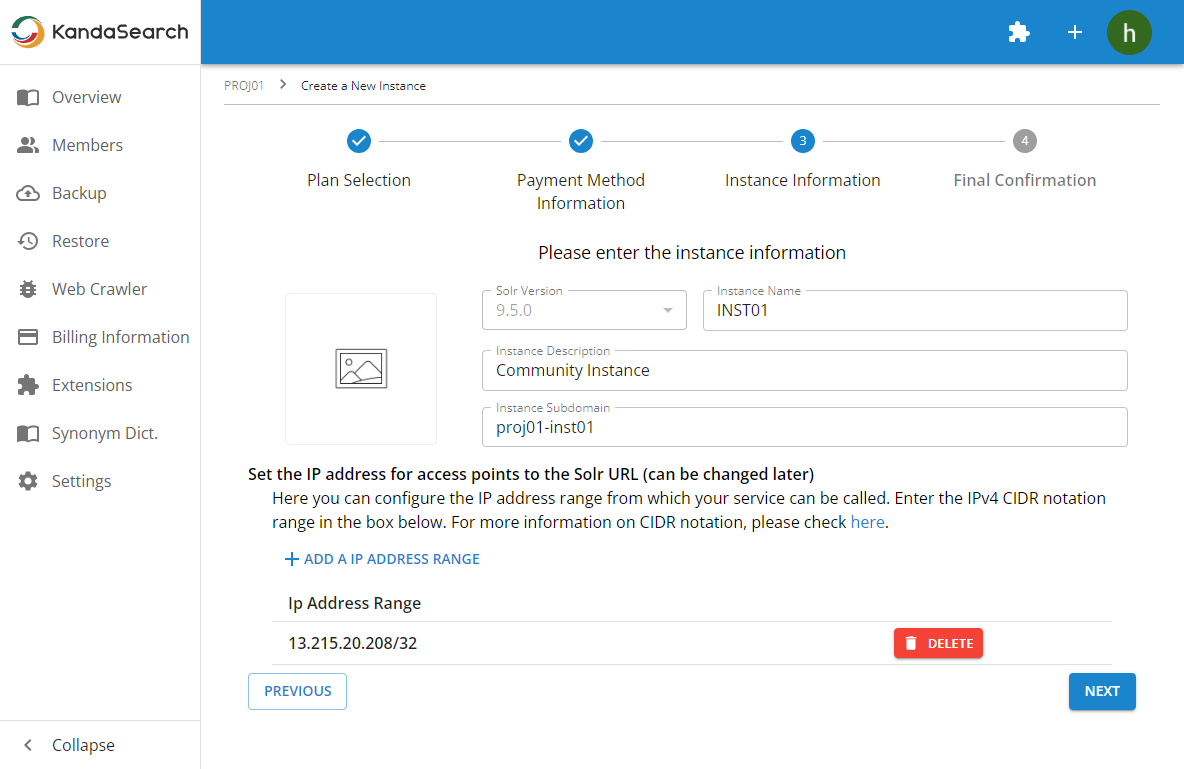
Step-3
You will enter the following instance information on the "Instance Information" screen.
- Solr Version
Specify the Solr version. For the Community Plan, this will be the latest version available at the time. (Cannot be changed) - Instance Name
Specify any instance name you like. This will be used for identification on the instance list screen, for example. - Instance Description
Specify an overview of the instance's usage purpose, etc. - Instance Subdomain
Specify the instance subdomain using half-width alphanumeric characters and hyphens. This will be part of the URL used to access the instance from the internet. - Instance logo
Specify an original image for the instance logo, similar to the project logo, to enhance ease of identification and affinity on various screens. - Configure the source IP address for accessing the search engine instance URL (restricting access to the instance by IP address)
The instance is set to deny all access from the internet to the instance. By registering the source IP addresses of the server using the Apache Solr API or the computer using Solr Admin in CIDR format, you can access KandaSearch. The range of registrable sets varies depending on the pricing plan. This setting can be edited in the "Settings" of the instance view after creating the instance.
Once all the inputs are complete, click "NEXT."
Step-4
On the "Final Confirmation" screen, you will review the registration details one last time. Click "CONFIRM" to create the instance, and the instance overview will be displayed.
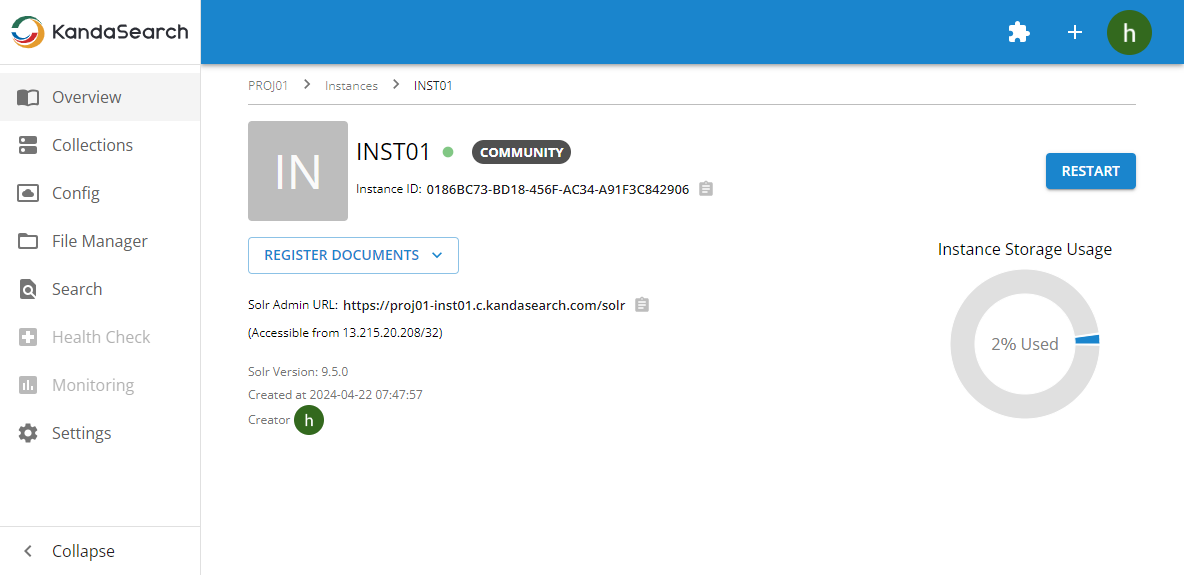
Checking the Status After Instance Creation
Creating an instance may take several minutes. Please wait until the instance is created.
The status of the instance during and after creation can be checked at any time on the instance overview. The items you can check are as follows:
- Instance Name
- Status Indicator (Continuous green lights indicate "Normal")
- Pricing Plan Name
- Instance ID
- Document Registration Button (Execute Indexing)
- Instance Storage Usage
- Solr Admin URL (Displayed after setting allowed IP ranges)
- Accessible IP address ranges
- Solr Version
- Instance Creation Date and Time
- Instance Creator
Instance Verification
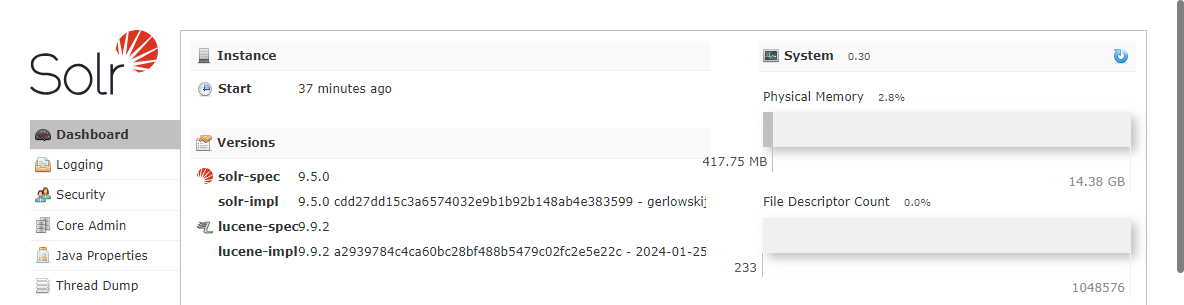
To check if the instance is functioning properly, let's access the Solr Admin URL from your computer's browser.
Click on the copy icon at the right end of the Solr Admin URL displayed on the instance overview screen, and paste the URL into your browser's address bar.
If the Solr Admin screen is displayed, the instance has been successfully created and is functioning properly. And the allowed IP address range is also correctly set.
If the KandaSearch official website's homepage is displayed, there may be an issue with the Accessible IP address ranges settings.
Click on "Settings" in the left-side menu, then on the displayed "Settings" screen, verify and edit the allowed IP address range information. (Changes may take a few minutes to reflect in the system.)
Project View and Instance View
At the end of this chapter, we'll briefly review the Project View and Instance View we've covered so far.
Please pay attention to the differences in the items displayed in the left-side menu of each view.
Project View
This is the view for managing projects.
Click on the KandaSearch logo at the top left of the screen, and then click on the project name from the project list to display this view.
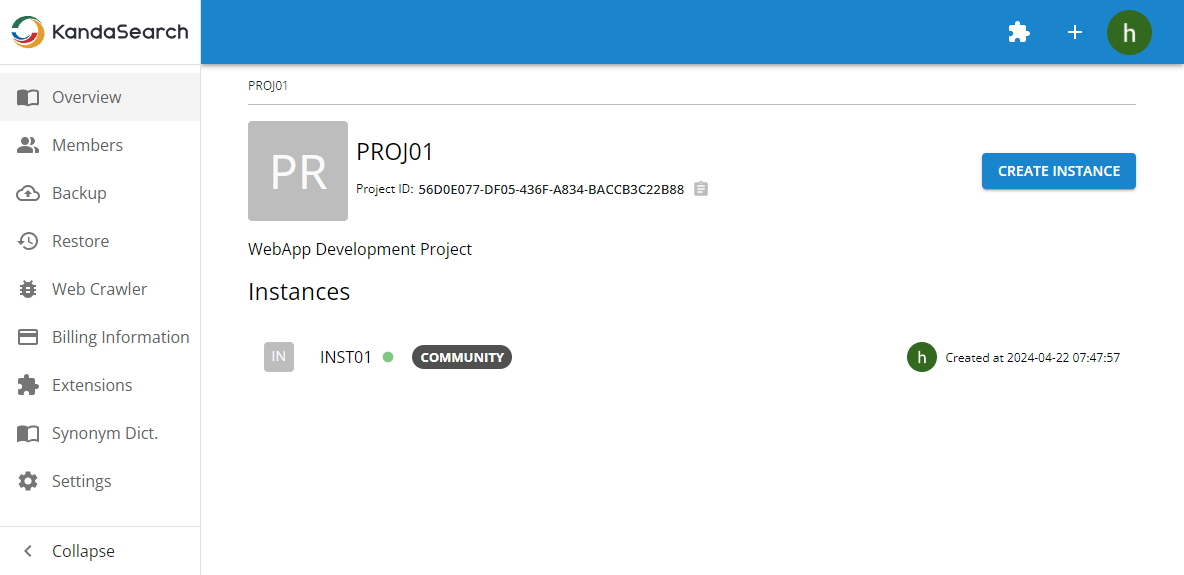
Left Side Menu Structure (Some items may not be available depending on the plan and roles assigned to members)
- Overview - You can create and view a list of instances.
- Members - You can add and view a list of members.
- Backup - You can perform tasks such as backing up indexes and files, and checking backup jobs.
- Restore - You can check the list of restore jobs.
- Web Crawler - You can add and manage web crawlers.
- Billing Information - You can edit your payment information.
- Extensions - You can check and download the extensions you added from the extension library.
- Synonym Dictionary - You can create, import, and deploy synonym dictionaries.
- Settings - You can edit and manage project information.
Please refer to the Document for more details on each features.
Instance View
This is the view for managing instances.
You can access it by clicking on the instance name within the Project Overview screen.
Left Side Menu Structure (Some items may not be available depending on the plan and roles assigned to members)
- Overview - You can check the instance status and register documents, among other functions.
- Collections - You can add collections and check the list, among other functions.
- Config - You can check and edit configuration files.
- File Manager - You can check and edit various files related to the instance.
- Search - You can select a collection and perform various searches. You can also download the WebApp application.
- Health Check - You can configure instance monitoring. This feature is available for Standard Plan and above.
- Monitoring - You can check the usage status of various instance resources. This feature is available for Standard Plan and above.
- Settings - You can edit and manage instance information.
Please refer to the Document for more details on each features.