
TUTORIAL
05. Search
On this page
- Searching from the Search UI
- Faceting
- Highlighting
- Using Solr Admin
- Using a Synonym dictionary
- Automatic suggestions for query
Here, we will explain how to use KandaSearch's search UI, as well as techniques to make searching more convenient and search results easier to read.
Searching from the Search UI
Searching the index of the livedoor news corpus registered in the previous chapter.
The functions and operations introduced here are just a small part of the features available in the Search UI.
Please refer to the Document for more details on each features.
Let's try searching
Click 'Search' from the left side of the Instance View.
Select 'livedoornews' in 'Collections' and click the blue 'Search' button.
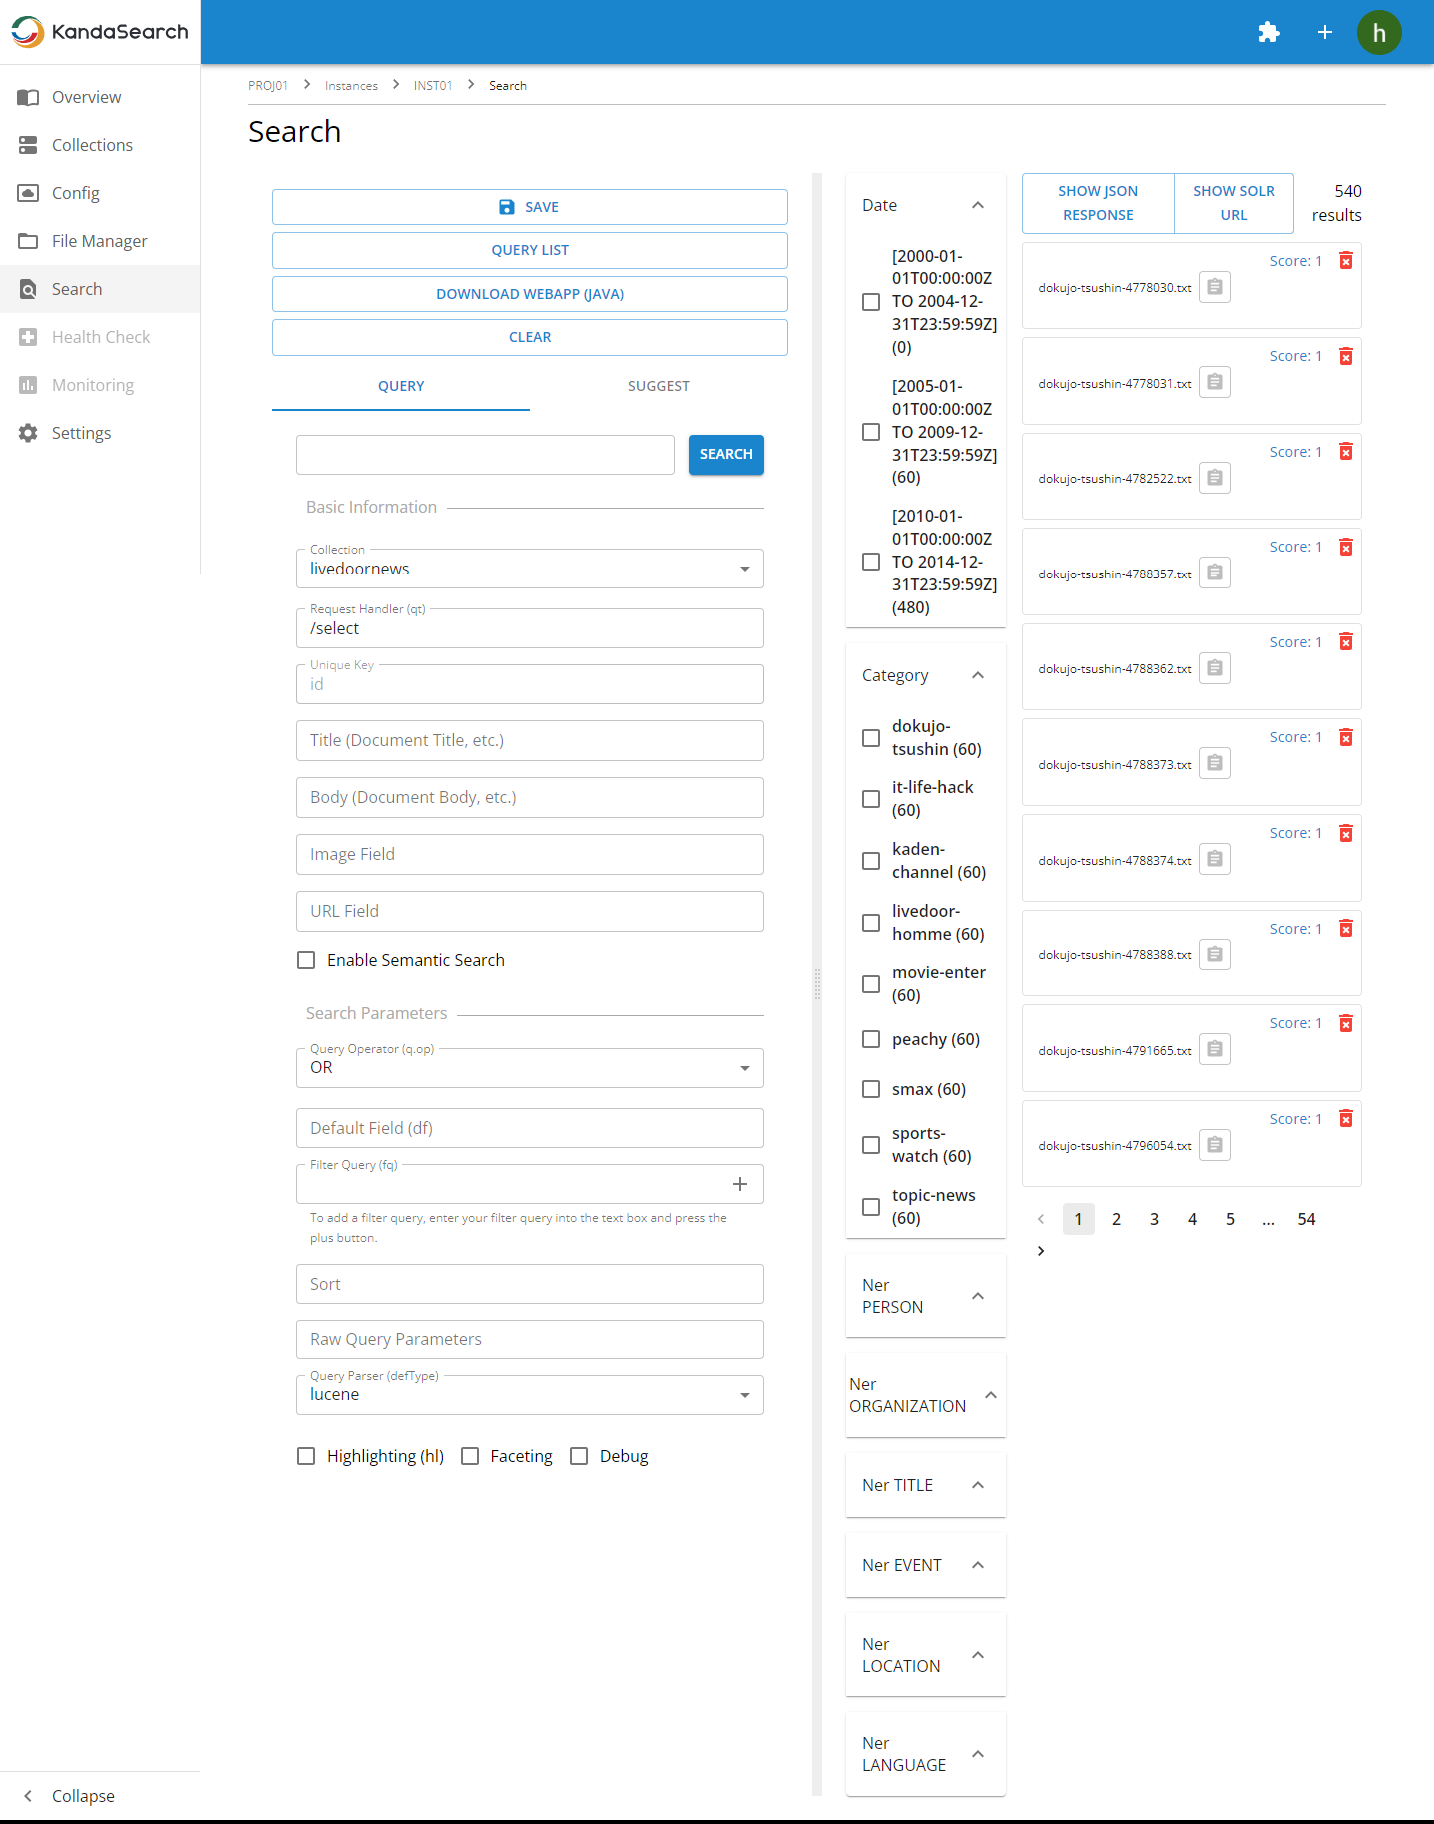
When you search without entering any search keywords into the input box, the following screen will be displayed.
The key points of the display content on this screen are as follows.
- The left pane shows the search criteria, while the right pane displays the search results.
- Since no keywords were specified, all records are included in the search.
- Only the IDs are displayed for each result.
- Hovering over an ID reveals a pop-up displaying information from other fields within that document.
- Results exceeding the number of items displayed on one screen can be viewed using the pager at the bottom of the search results.
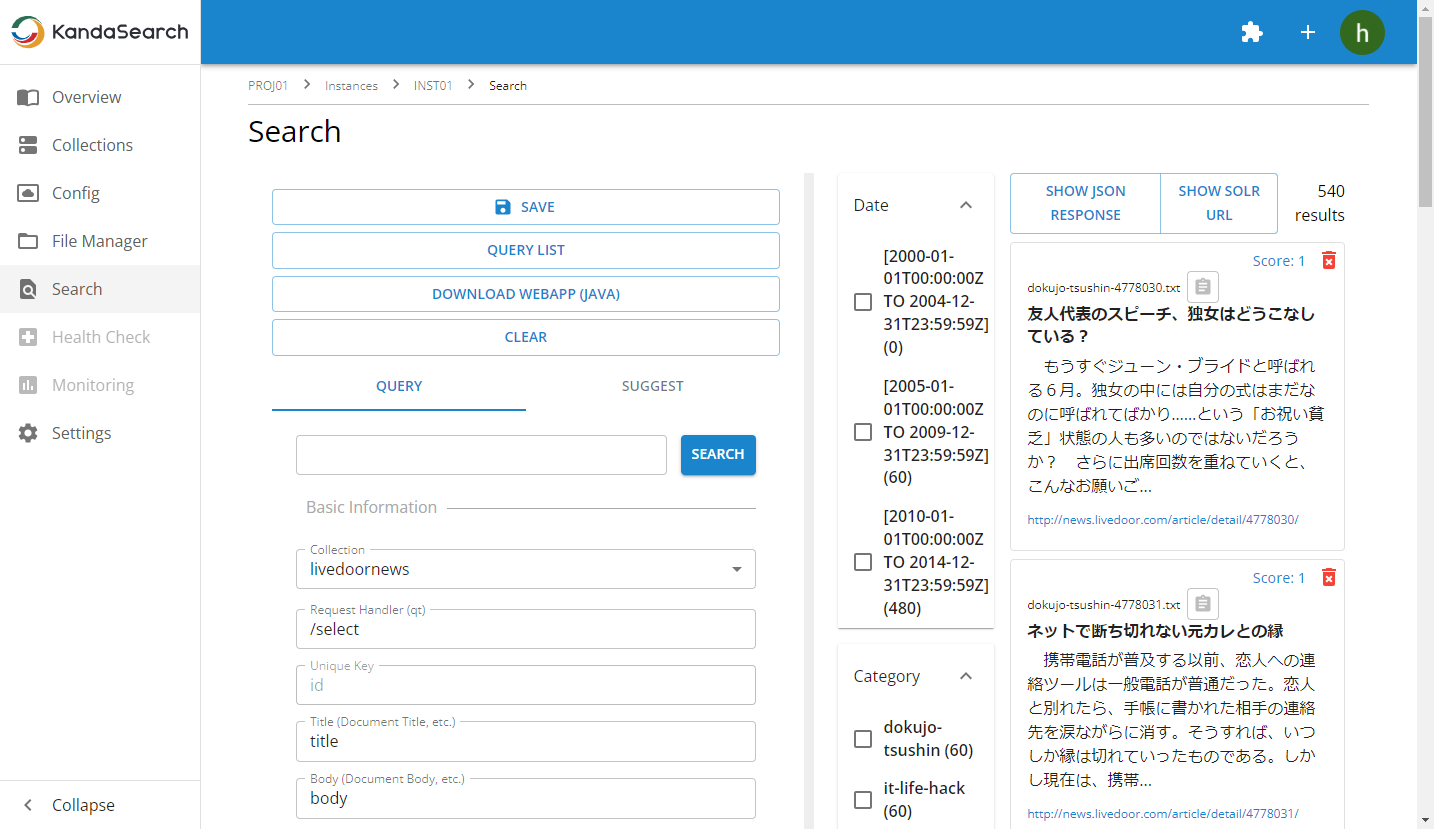
Try specifying display fields and conducting a search.
Next, let's try displaying information from other fields in the search results.
In the search result display of KandaSearch's search UI, you can display the following items for each result:
- Title
- Body
- Image
- URL
You can easily specify fields defined in the schema for these.
In the left pane, specify as follows:
- In the 'Title (Article Title, etc.)' field, enter 'title'
- In the 'Body (Article Body, etc.)' field, enter 'body'
- In the 'URL' field, enter 'url'
Finally, click on 'SEARCH'.
※ In this schema, the field name for the title (such as article title) in the search results is 'title', and the field name for the body (such as article body) is 'body' (and the same for 'url'). Therefore, this specification was made. Please specify the field names defined in the schema in the 'Title', 'Body', and 'URL' fields.
How is the display of the search results?
The display of search results seems to have become richer with more display items compared to before, don't you think?
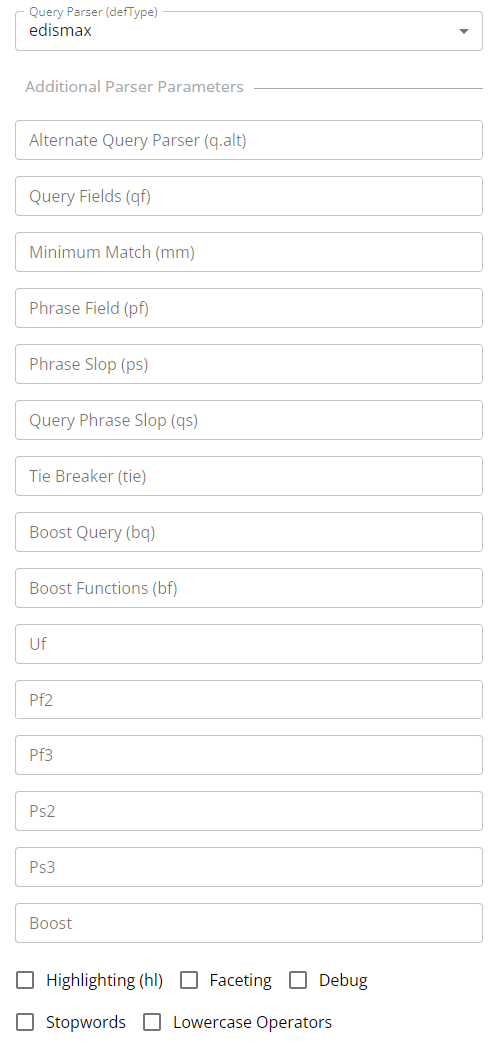
In the left pane, selecting the commonly used search technique 'edismax' as the query parser (defType) expands the available parser parameters, enabling more flexible searches.
For instance, specifying field names in the query fields (qf) allows you to specify the fields to search across during the search.
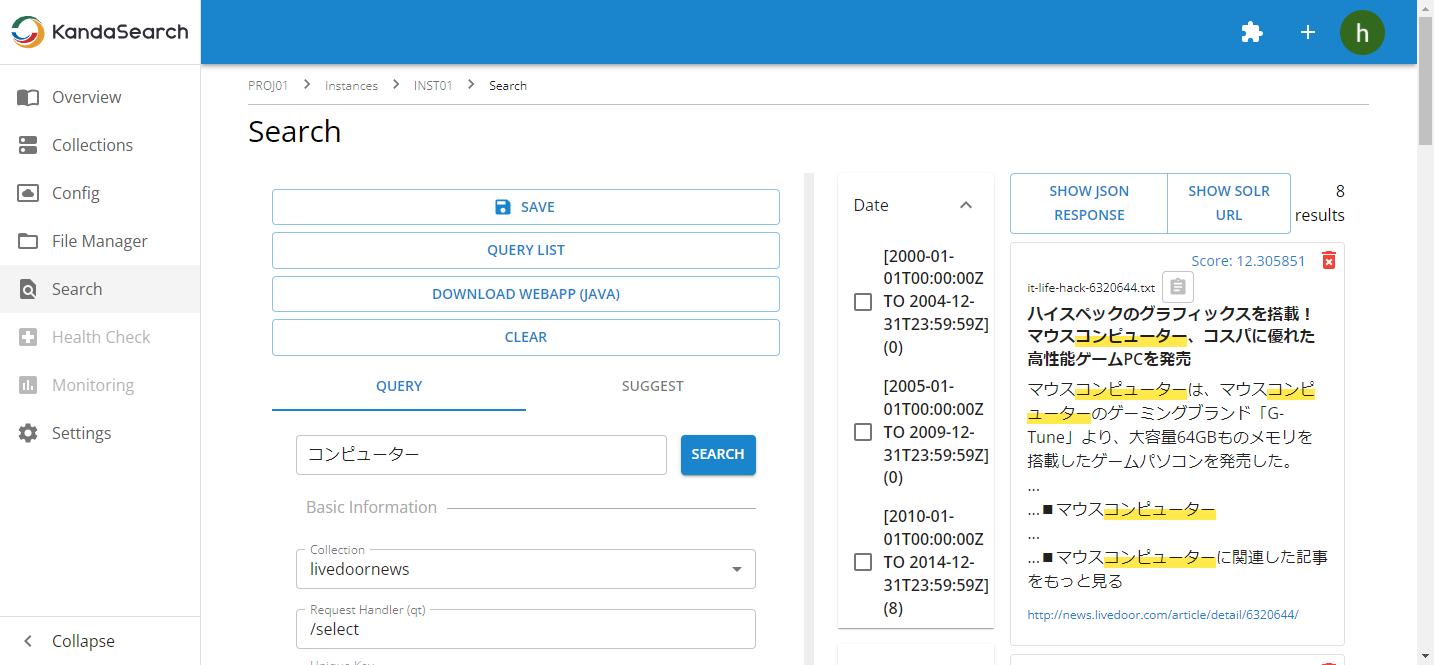
Search by specifying keywords
Now, let's search by specifying keywords in the 'Search Keyword' field.
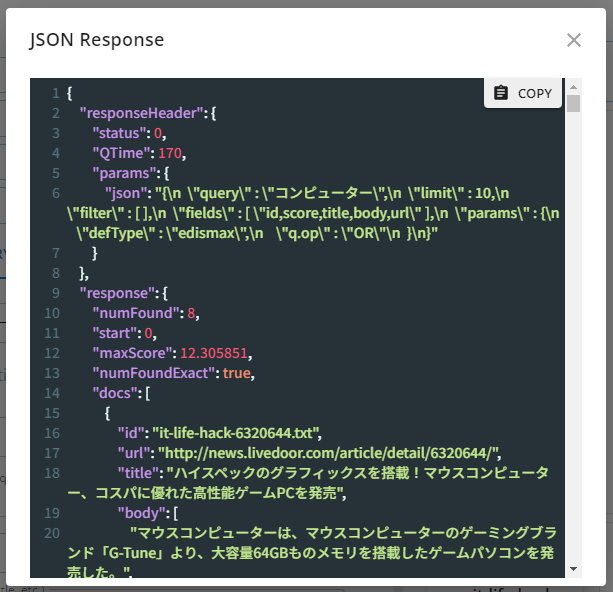
For example, if you enter 'コンピューター' and click 'SEARCH', 8 results matching the keyword will be displayed.
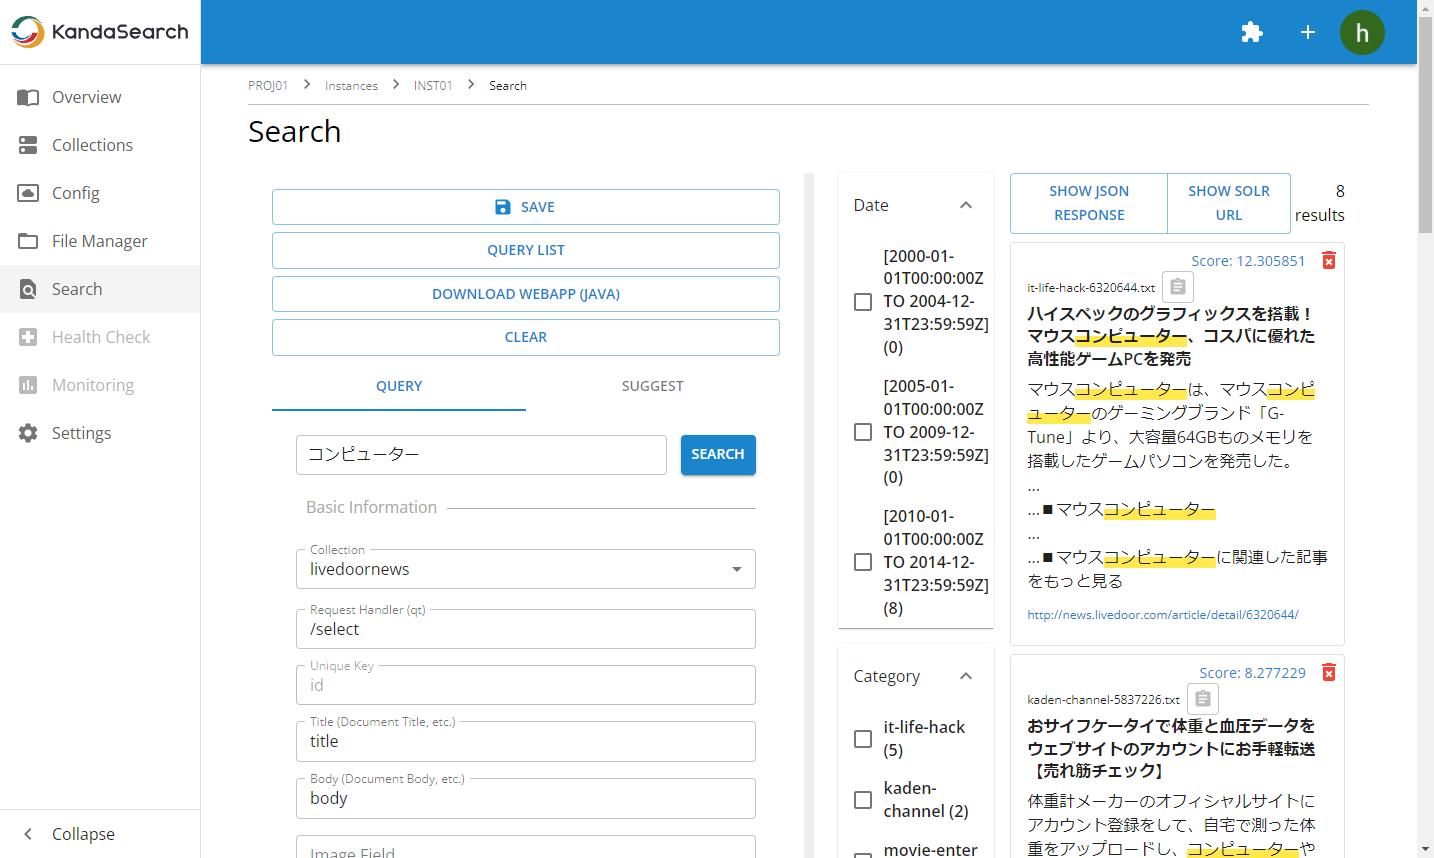
Let's adjust various search parameters in the left pane to refine and display the most relevant search results.
Convenient features for testing
As the conditions specified in the left pane increase, it can become cumbersome to repeat the condition specification when searching with the same search criteria. In that case, you can click 'Save' in the left pane to save the currently displayed query with a name.
Saved queries can be viewed and loaded from the 'Query List'.
Additionally, saved queries can be shared among project members, making them very useful for checking and debugging.

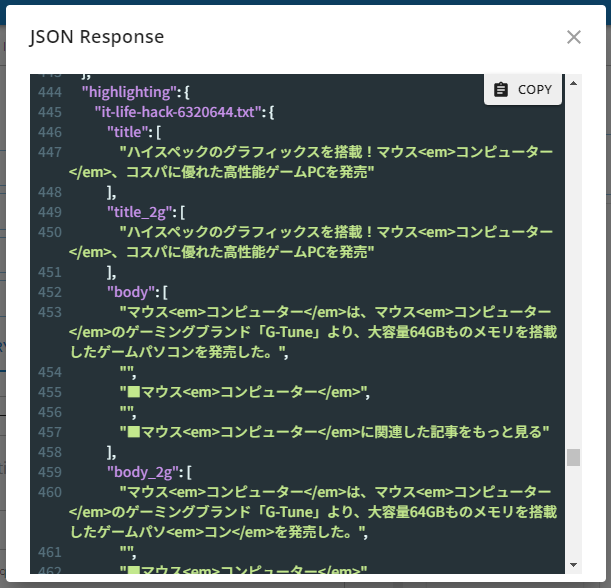
After displaying the search results, clicking on 'SHOW JSON RESPONSE' at the top of the right pane allows you to review the response from Apache Solr in JSON format.
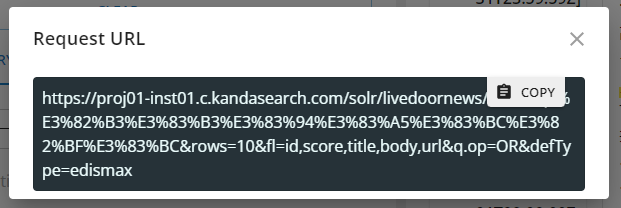
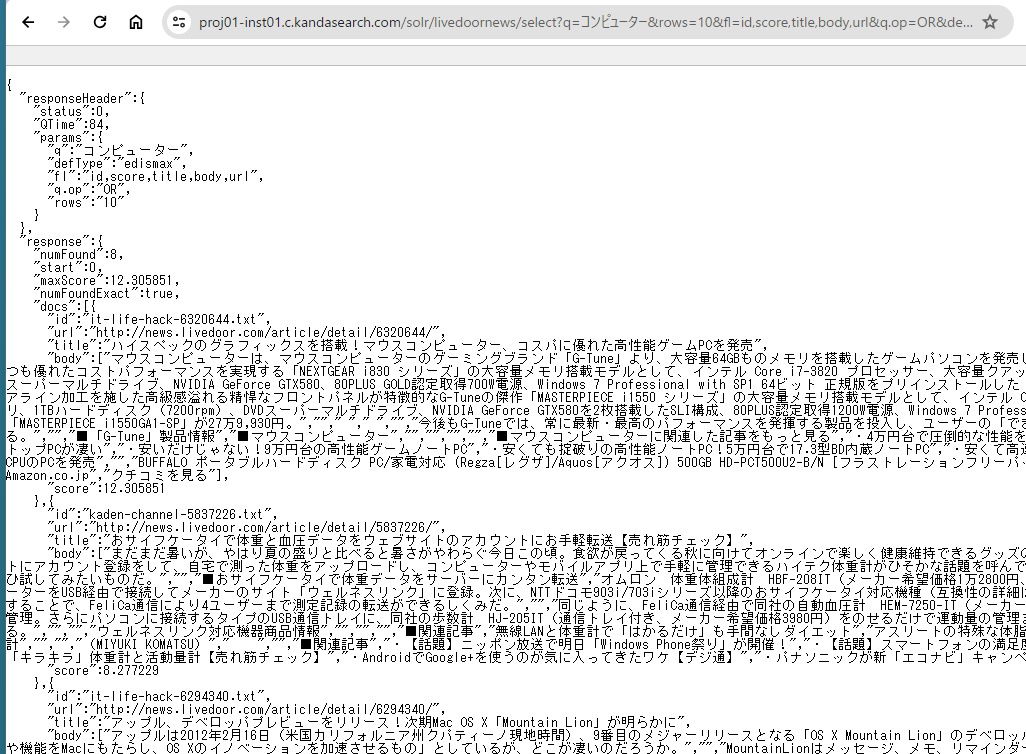
Furthermore, after displaying the search results, clicking on 'SHOW SOLR URL' at the top of the right pane will display the URL of the 'search request (HTTP GET)' for the current query. You can copy it and paste it into the browser's address bar to execute it and check the raw response. (If you are redirected to the top page of the KandaSearch official website, it means there is an error in specifying the allowed IP address range. In this case, you need to register the IP address in the 'Settings' of the instance view.)
Faceting
Faceting is a feature that returns the breakdown (categorical items) of search results along with their counts.
Combining 'faceting' with 'refinement search' brings the following effects to the search UI.
- No need to determine attributes (such as "file type," "creation date," "price," etc.) during search.
- Simple operation until obtaining search results.
- No disappointment of "0 hits" (as refinement search can be performed while viewing search results).
To use facets, turn on the "Faceting" checkbox and specify facet options.
You can specify the following two types of options:
- facet.field - Specifies the field name. Returns the number of documents for each field value.
- facet.query - Specifies an arbitrary query (search expression). Returns the number of documents for each query.
Notes.
In this case, specify the query in the 'fq' parameter for refinement search (adding conditions to the 'q' parameter with AND is incorrect usage).
In the configuration of the livedoor News Corpus, facets are set to function by default, and facets such as 'Date' and 'Category' are displayed in the right pane of the search results.
The relevant section in solrconfig.xml
 <requestHandler name="/select" class="solr.SearchHandler">
    <lst name="defaults">
      <str name="echoParams">explicit</str>
      <str name="df">body</str>
      <str name="q.op">OR</str>
      <str name="defType">edismax</str>
      <str name="qf">title^5 title_2g body^3 body_2g body_reading</str>
      <str name="mm">100%</str>
      <str name="q.alt">*:*</str>
      <str name="facet">on</str>
      <str name="facet.field">category</str>
      <str name="facet.field">ner_PERSON</str>
      <str name="facet.field">ner_ORGANIZATION</str>
      <str name="facet.field">ner_TITLE</str>
      <str name="facet.field">ner_EVENT</str>
      <str name="facet.field">ner_LOCATION</str>
      <str name="facet.field">ner_LANGUAGE</str>
      <bool name="hl">true</bool>
      <bool name="hl.usePhraseHighlighter">true</bool>
      <bool name="hl.highlightMultiTerm">true</bool>
      <int name="hl.snippets">3</int>
      <str name="hl.fl">title,title_2g,body,body_2g,body_reading</str>
      <bool name="hl.requireFieldMatch">true</bool>
      <str name="f.title.hl.alternateField">title</str>
      <str name="f.body.hl.alternateField">body</str>
      <int name="f.body.hl.maxAlternateFieldLength">100</int>
    </lst>
    <lst name="appends">
      <str name="facet.query">date:[2000-01-01T00:00:00Z TO 2004-12-31T23:59:59Z]</str>
      <str name="facet.query">date:[2005-01-01T00:00:00Z TO 2009-12-31T23:59:59Z]</str>
      <str name="facet.query">date:[2010-01-01T00:00:00Z TO 2014-12-31T23:59:59Z]</str>
    </lst>
  </requestHandler>
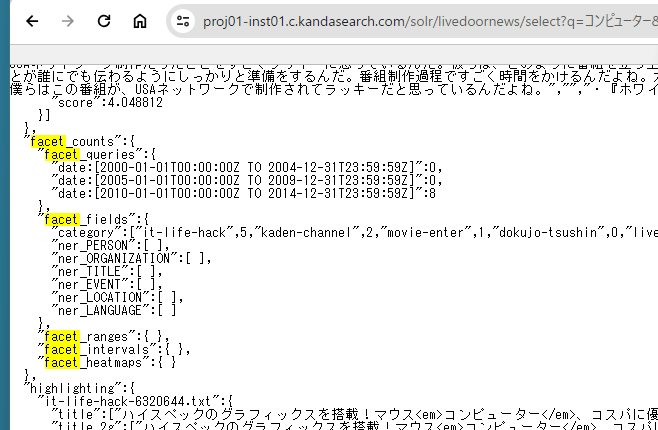
In 'SHOW JSON RESPONSE', you can confirm how facet information is stored in the search response. Also, the figure below shows what appears when you click 'SHOW SOLR URL' display the URL in the Chrome browser, and then display the 'facet' section in the browser.
Highlighting
Highlighting is a feature that extracts snippets containing the search keywords from documents that match the search query and returns them along with the search results. By displaying highlighted snippets in the search results list, users can easily find the documents they are looking for.
When you view the snippet section in the JSON-formatted response, you can confirm that the search keywords are highlighted using HTML tags.
The highlighting feature of Apache Solr has advantages over performing highlighting processing on the client side after receiving the response, for the following reasons:
- There is no need to write logic to extract snippets.
- Highlighting can be performed taking into account synonyms, variations in spelling, etc.
- It reduces network load, especially when the size of a single document is large.
In the configuration of the livedoor News Corpus, highlighting is set to function by default.
The relevant section in solrconfig.xml
 <requestHandler name="/select" class="solr.SearchHandler">
    <lst name="defaults">
      <str name="echoParams">explicit</str>
      <str name="df">body</str>
      <str name="q.op">OR</str>
      <str name="defType">edismax</str>
      <str name="qf">title^5 title_2g body^3 body_2g body_reading</str>
      <str name="mm">100%</str>
      <str name="q.alt">*:*</str>
      <str name="facet">on</str>
      <str name="facet.field">category</str>
      <str name="facet.field">ner_PERSON</str>
      <str name="facet.field">ner_ORGANIZATION</str>
      <str name="facet.field">ner_TITLE</str>
      <str name="facet.field">ner_EVENT</str>
      <str name="facet.field">ner_LOCATION</str>
      <str name="facet.field">ner_LANGUAGE</str>
      <bool name="hl">true</bool>
      <bool name="hl.usePhraseHighlighter">true</bool>
      <bool name="hl.highlightMultiTerm">true</bool>
      <int name="hl.snippets">3</int>
      <str name="hl.fl">title,title_2g,body,body_2g,body_reading</str>
      <bool name="hl.requireFieldMatch">true</bool>
      <str name="f.title.hl.alternateField">title</str>
      <str name="f.body.hl.alternateField">body</str>
      <int name="f.body.hl.maxAlternateFieldLength">100</int>
    </lst>
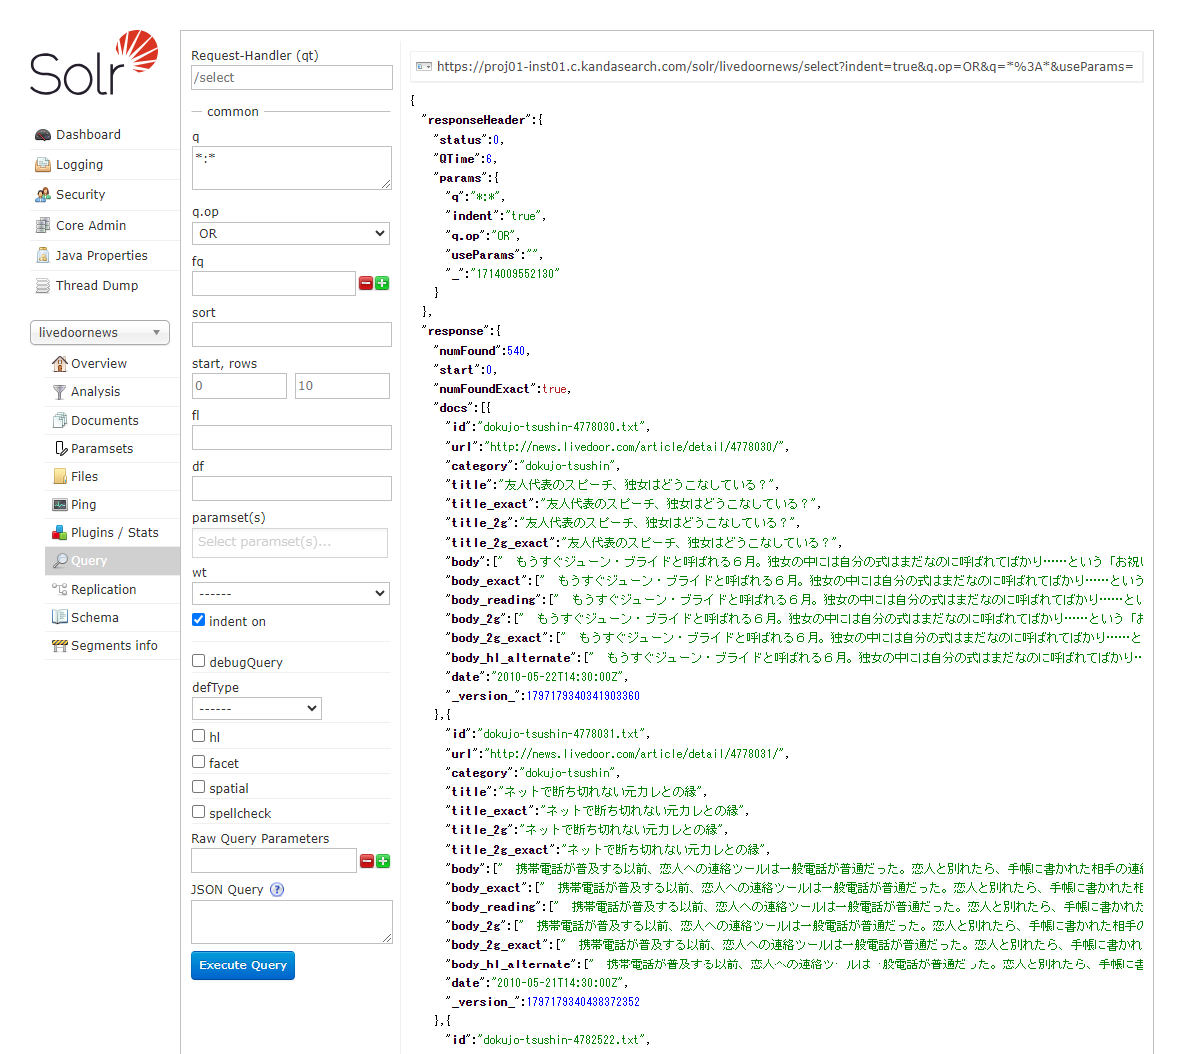
Using Solr Admin
If you install Apache Solr on your own server and use it, the UI tool to use in a control panel-like manner is 'Solr Admin'.
In KandaSearch, you can also use Solr Admin.
Let's display Solr Admin and try searching using the method described in the 'Creating a Search Engine' chapter.
After displaying the Solr Admin screen, select 'livedoornews' from the 'Core Selector' on the left side, then click on 'Query' also on the left side, and finally click on 'Execute Query' at the bottom of the search criteria on the right side.
In Solr Admin UI, grouping searches and finer search specifications that are not supported in KandaSearch's search UI are possible.
On the other hand, KandaSearch's search interface supports a carefully selected set of basic parameters commonly used by default. Additionally, search results are formatted for easy readability, including facets and highlights. As mentioned earlier, queries can be saved and shared among project members. Furthermore, as described later, query suggestions can be executed in real-time to verify functionality.
By using KandaSearch's search UI, project teams can quickly develop search functionality for web applications while sharing their vision. They can efficiently progress with web application development by utilizing both KandaSearch's search UI and Solr Admin UI for verifying search functionalities (Solr search parameters) not supported in KandaSearch's search UI, depending on the purpose.
Using a Synonym dictionary
As metrics for evaluating the performance of full-text search, we have 'recall' and 'precision'.
Recall indicates 'how few search omissions there are' while precision indicates 'how few incorrect search results (noise) there are'.
Among these, an effective means to increase recall is the use of a synonym dictionary.
Let's consider a case where, when searching with the keyword 'スマホ', we also want to include documents containing 'スマートフォン' (smartphone) in the search results.
Using the data file 'Livedoorニュースコーパス(mini)' for the collection 'livedoornews,' we perform searches using both 'スマホ' and 'スマートフォン' (smartphone) to confirm the existence of documents containing these keywords.
There are 54 documents containing 'スマホ' and 90 documents containing 'スマートフォン'.
First, let's set up the synonym dictionary.
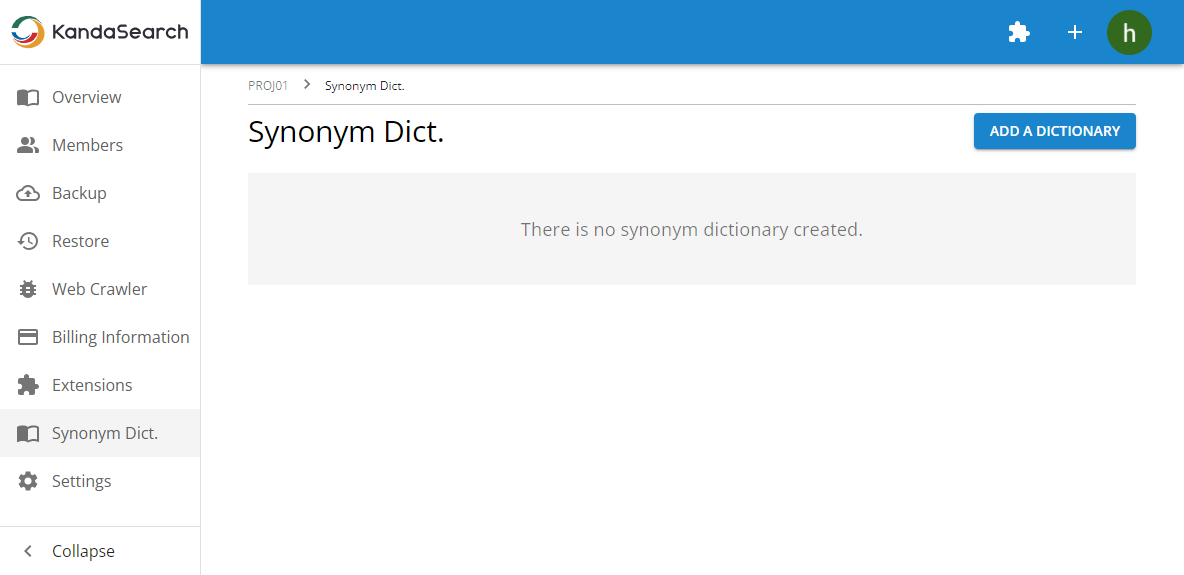
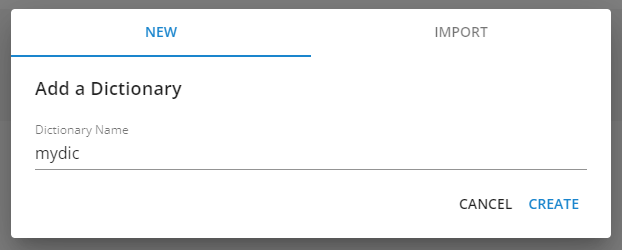
The synonym dictionary is managed at the project level, so select 'Synonym Dict.' from the left side of the project view, and then click the 'ADD A DICTIONARY' button on the synonym dictionary screen.
While the 'NEW' tab is selected, specify any name (here, let's use 'mydic') and click 'CREATE'.
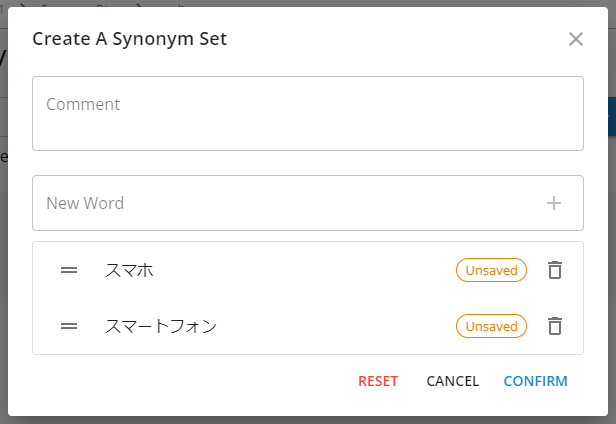
Click on the 'View Dictionary' icon (hovering over the icon will display the function name) in the row for the synonym list 'mydic', and then click on 'ADD A SYNONYM SET'.
After entering 'スマホ' in the 'New Word' field, click the '+' icon to add it. Then, enter 'スマートフォン' in the 'New Word' field, click the '+' icon to add it, and finally click 'CONFIRM' to register the synonym set. The comment field can be omitted.
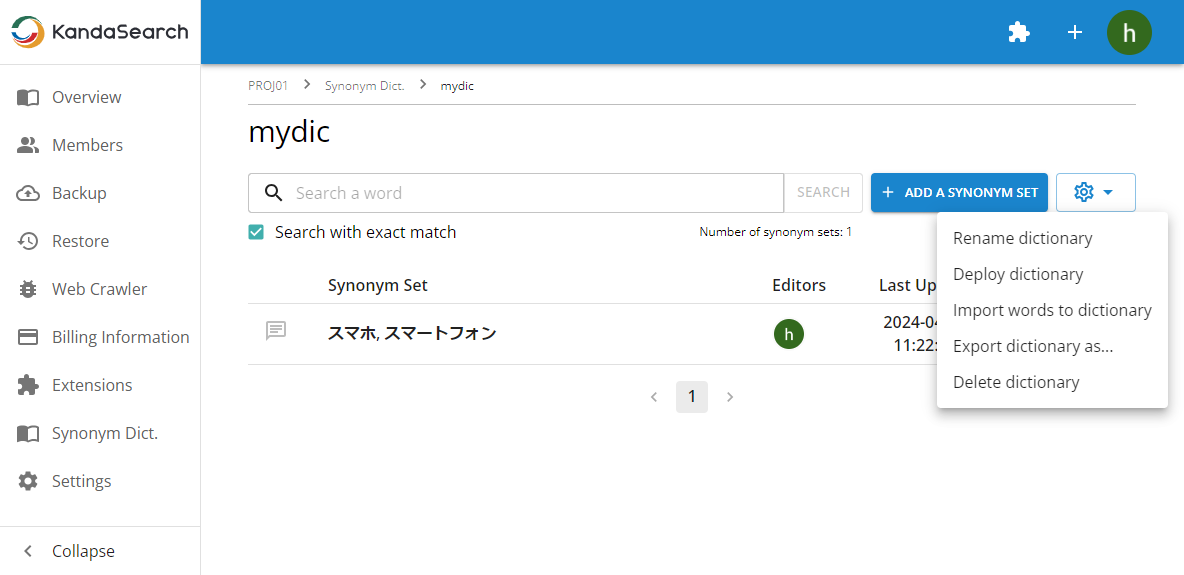
Now that the synonym set has been registered, to deploy the synonym dictionary, select 'Deploy dictionary' from the gear icon.
After editing the synonym set, be sure to perform this deployment operation.
In the 'Deploy Dictionary' screen, specify the following items:
- Instance: The instance of the livedoornes collection
- Collection: livedoornews
- Synonym Filter: ManagedSynonymGraphFilter
- Managed Resource: synonym-ja
- Parameters:
- tokenizerFactory: solr.JapaneseTokenizerFactory
- tokenizerFactory.mode: normal
- ignoreCase: true
- format: solr
After specifying the above, click 'Confirm' to perform the deployment and collection reload, enabling the use of the synonym dictionary.

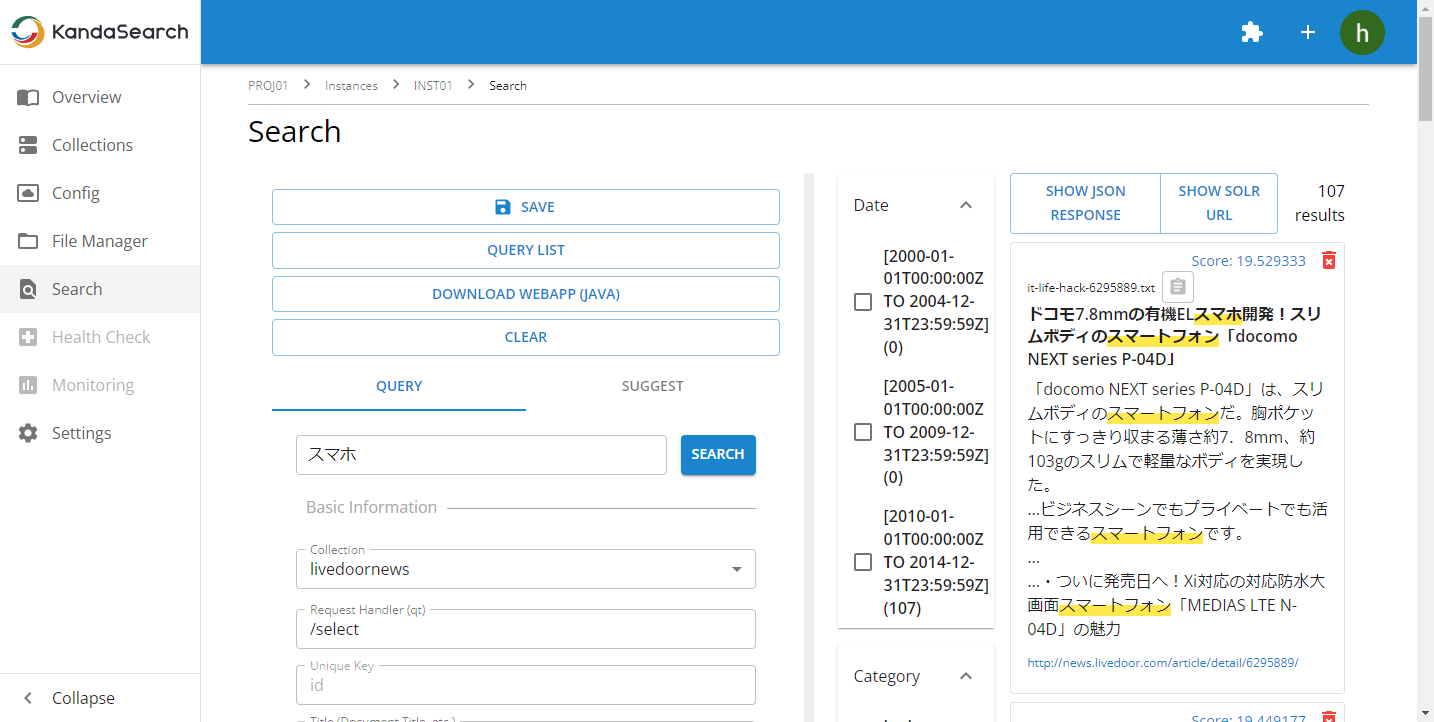
Now, let's search using the activated synonym dictionary.
From the instance view, call up the saved query from the previous steps in 'Search' screen, then enter 'スマホ' or 'スマートフォン' in the 'Search Keywords' field and search to confirm mutual hits.
Automatic suggestions for query
When entering search keywords on a search site, you may encounter a situation where suggestions are provided when you start entering a few characters. This feature is called 'query suggestions'. It is also known by other names such as 'auto complete'. It is provided to make searching more convenient by completing search keyword input.
This query suggestion can be implemented using the SuggestComponent in Apache Solr.
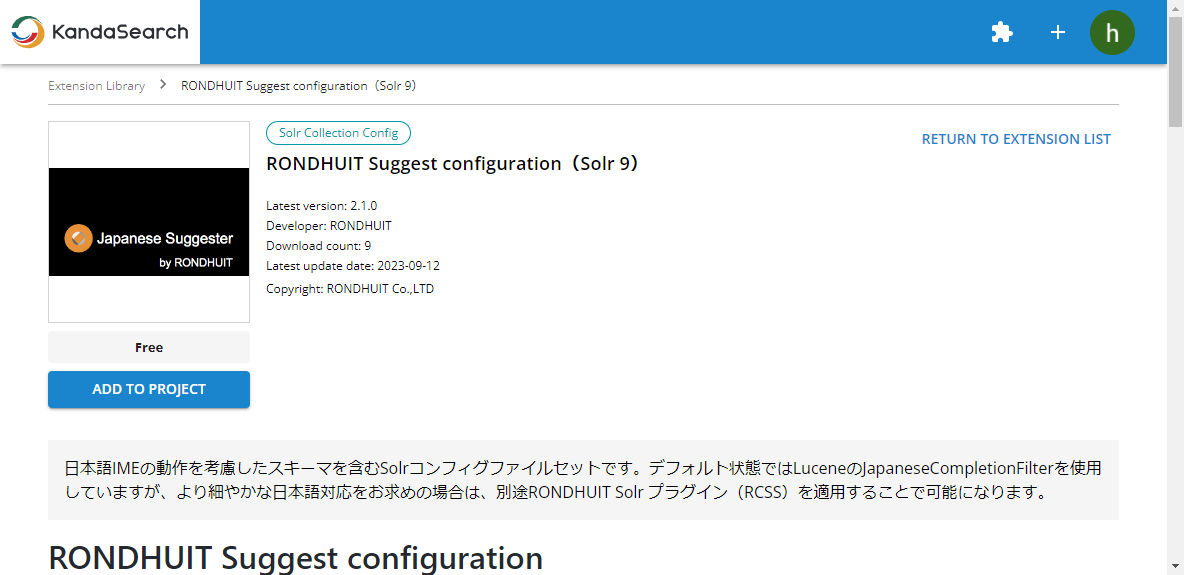
Here, we will use the 'RONDHUIT Suggest configuration (Solr 9)' provided in the extension library of KandaSearch to explain the configuration, operation verification, and points to consider when implementing query suggestion.
Adding a collection for suggestion
First, click on the 'Extension Library (puzzle piece icon)' icon at the top of the KandaSearch screen, and add 'RONDHUIT Suggest configuration (Solr 9)' from the extension library to the project. When adding, please pay attention to the Solr version (in this case, for Solr 9) and select the target project.
RONDHUIT Suggest configuration(Solr 9) CONFIG
Move to the project view of the target project, click on 'Extensions' on the left side, and then click 'Download' inside the 'RONDHUIT Suggest configuration (Solr 9)' block to download the latest version of the configuration file to your computer.
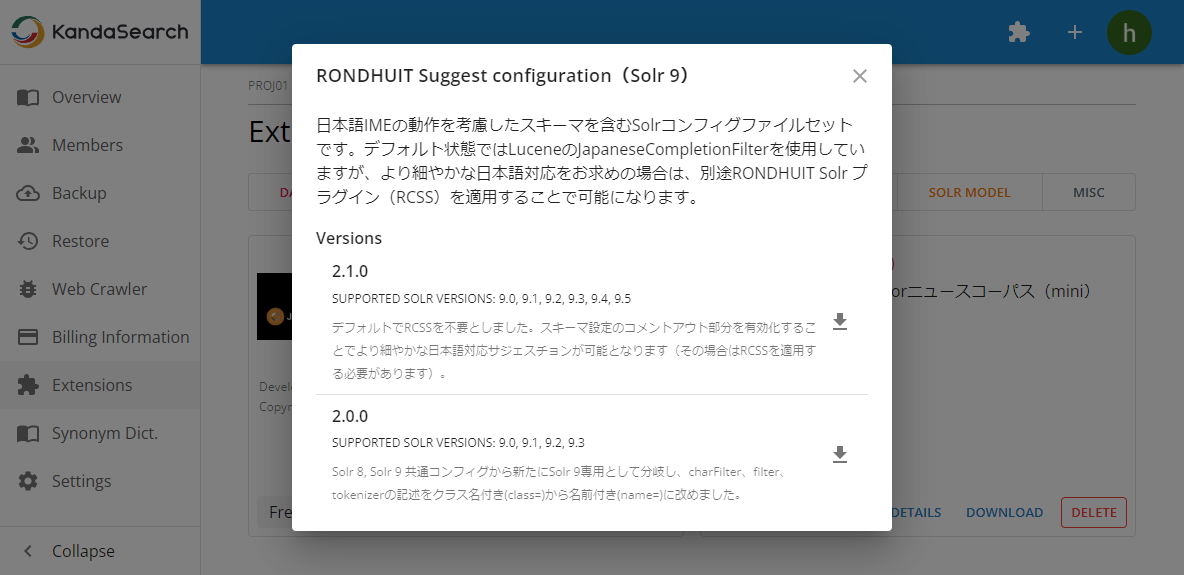
Select 'Collections' on the left side of the instance view, then click on 'ADD A COLLECTION'. On the 'IMPORT' tab, specify the downloaded configuration file and the collection name (here, let's use 'suggest9'), then click 'SAVE'.
Registering suggestion data sources to the collection
Before performing the test of suggestion, it is necessary to register documents (suggestion data sources) in this 'suggest9' collection. These documents will be displayed during suggestion.
The key point of query suggestion lies not only in the configuration but also in determining 'what to suggest?'.
For example, in a book search system, it might be convenient for users if book titles and author names are registered as suggestion data sources. Additionally, to suggest frequently used keywords in the search system, past search keywords recorded in solr.log are often used as suggestion data sources.
One important point to note here is that when the system suggests something, it should not result in zero hits. Therefore, when extracting suggestion data sources from solr.log, it's necessary to devise a method where only entries with a hit count of one or more (recorded alongside search keywords in solr.log) are used as suggestion data.
Furthermore, regular updates to the suggestion data source may be necessary due to updates in documents or solr.log.
In this tutorial, instead of extracting from the documents to be searched or solr.log, we'll use the 'Terms Component' (https://solr.apache.org/guide/solr/latest/query-guide/terms-component.html) to retrieve a list of the top 1000 words from a suitable field (in this case, the body field). We'll then create a collection for suggestions (here, named suggest9) and register these words in the suggest field. This allows us to confirm the behavior of query suggestions. With this approach, since the relevant words are always present in the body field, there won't be zero hits.
Access the following URL from your browser to retrieve the top 1000 words that appear in the body field from the livedoornews index (the mini version) using the 'Terms Component' feature, in JSON format.
If the results are not displayed correctly, please check that the URL is correct and verify the IP permissions for the instance. Additionally, make sure to adjust the subdomain of the instance, project name, instance name, and collection name in the URL according to your environment.
https://proj01-inst01.c.kandasearch.com/solr/livedoornews/terms?terms=true&terms.fl=body&terms.limit=1000&terms.sort=count&wt=json

Based on the response obtained here, create a CSV file for use in registering documents to the suggest collection (here, suggest9).
The suggest field for this purpose can be confirmed in the 'Config' of the left-side menu in the Instance View, under 'managed-schema'.
<field name="point" type="int" sortMissingLast="true" indexed="true" stored="true"/>
<field name="suggest" type="string" indexed="true" required="true" stored="true"/>
The 'point' field above indicates the importance of the suggested keyword.
The data obtained using the aforementioned Terms Component function contains sets of 'word' and 'number of documents matching that word'. In this case, it seems reasonable to use the 'number of documents matching that word' returned by the Terms Component as the data to be set in the 'point' field. Therefore, create a file in the following CSV format using 'point' and 'suggest'. Please note that the character encoding of the CSV file should be UTF-8.
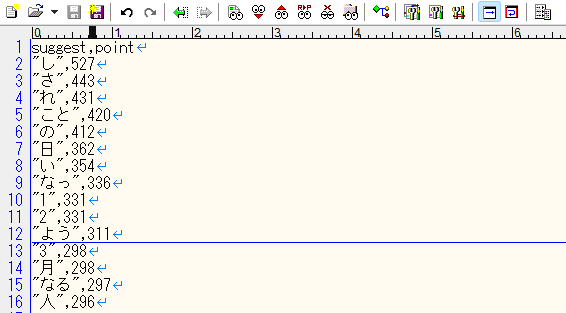
Register this CSV file as documents in the suggest collection (in this case, suggest9).
After copying the created file to a location accessible from the terminal on a Mac or from WSL (Windows Subsystem for Linux) on a Windows PC, execute the following curl command from the terminal.
curl -X POST 'https://proj01-inst01.c.kandasearch.com/solr/suggest9/update?commit=true&indent=true' --data-binary @suggest9.csv -H 'Content-Type: text/csv'

Confirm that the documents mentioned above have been registered in the suggest collection by accessing the "Search" screen from the instance view.
It seems to have been registered successfully.
Try the query suggestion
Let's try the query suggestion feature.
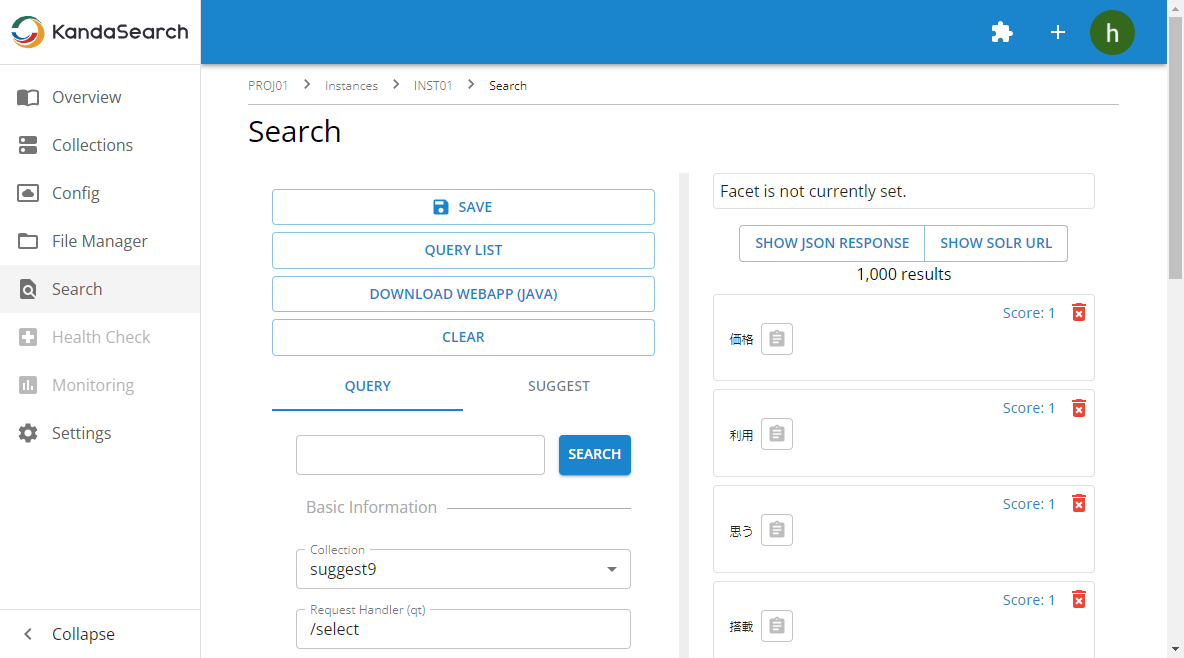
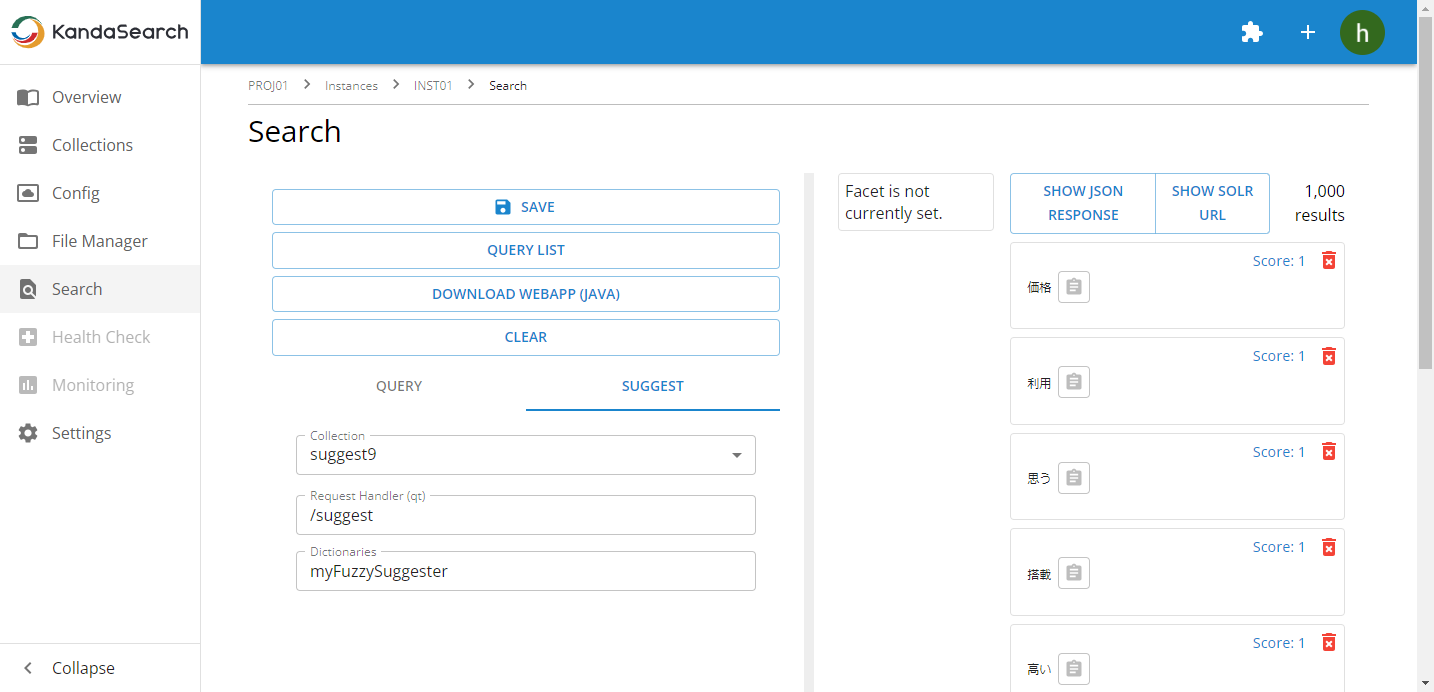
Select 'Search' from the left side of KandaSearch's Instance View.
Choose the 'SUGGEST' tab on the left pane of the search screen, and specify 'suggest9' for the collection and '/suggest' for the request handler. You can specify multiple dictionaries, such as myFuzzySuggester, myInfixSuggester, mySolrSuggester, and mySuggester, separated by commas.
With the 'SUGGEST' tab settings as they are, click on the 'QUERY' tab next, and try entering 'スマ' in the keyword input field. You will see suggestions as follows, confirming that the query suggestion is functioning.
