
TUTORIAL
06. WebApp Development
On this page
In the previous section, we confirmed that we can search using KandaSearch's search UI.
In practice, creating a search web application for users to perform search operations becomes necessary.
Here, we will describe the Apache Solr API and other relevant aspects to be used from the search web application.
Search API
To utilize the search engine created in KandaSearch from the internet, you can use the Solr API.
Let's try the Solr search API using the curl command from the terminal on Mac or Windows WSL.
First, click on 'Search' on the left side of the instance view from the browser, and in the left pane of the displayed search screen, specify "livedoornews" in the collection field and perform a search.
Once the search results are displayed, click on "SHOW SOLR URL" at the top of the right pane to copy the request URL to the clipboard.
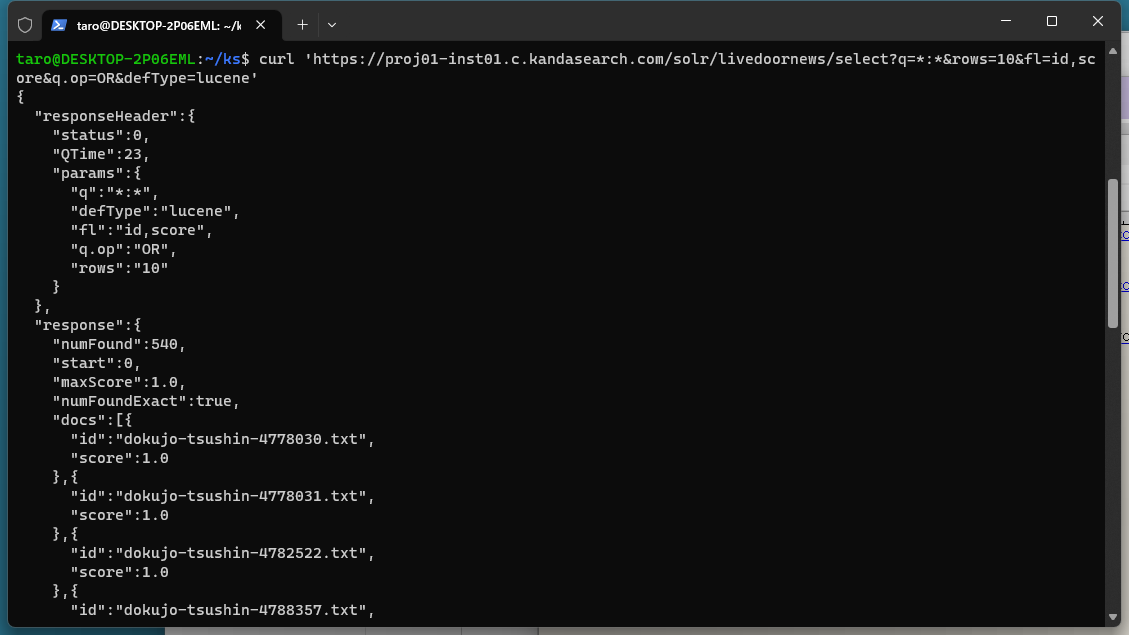
Next, by specifying the copied URL as shown below and executing the curl command, the response will be displayed.
If the result is not displayed, please ensure that the command entered in the terminal is correct and check the allowed IP address ranges for the instance.
Also, please adjust the subdomain of the instance, project name, and collection name in the URL according to your environment.
curl 'https://proj01-inst01.c.kandasearch.com/solr/livedoornews/select?q=*:*&rows=10&fl=id,score&q.op=OR&defType=lucene'
This time, on the KandaSearch search screen, specify the following items and click 'Search':
- Keyword: コンピューター
- Collection: livedoornews
- Title Field: title
- Body Field: body
- URL Field: URL
- Query Parser: edismax
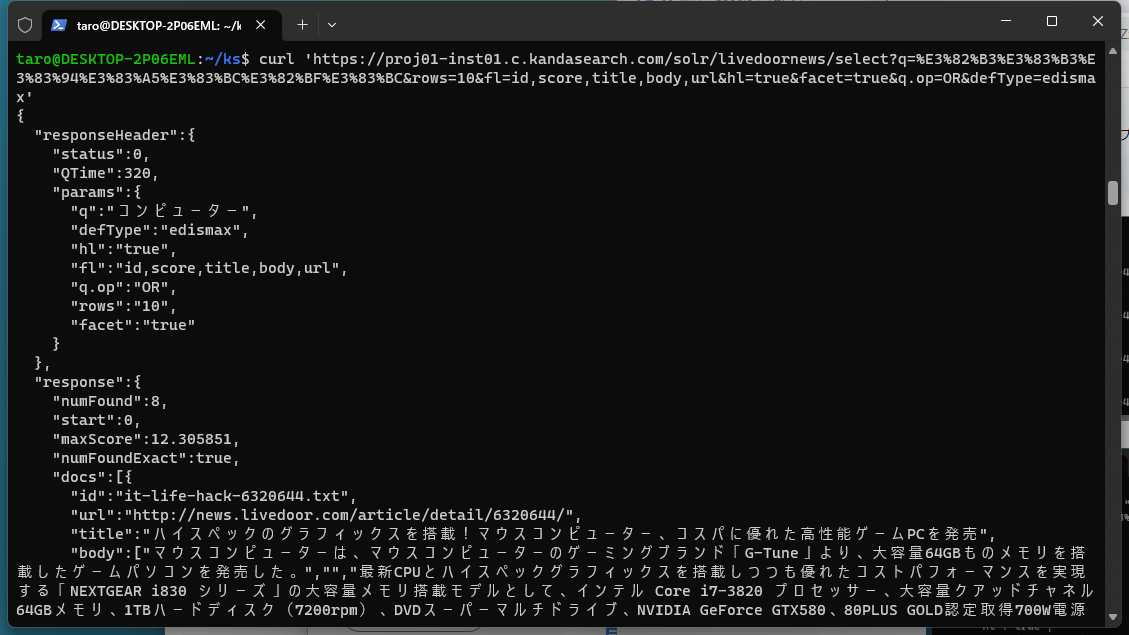
As before, click on 'SHOW SOLR URL' and use the copied URL from the clipboard to execute the curl command in the terminal window.
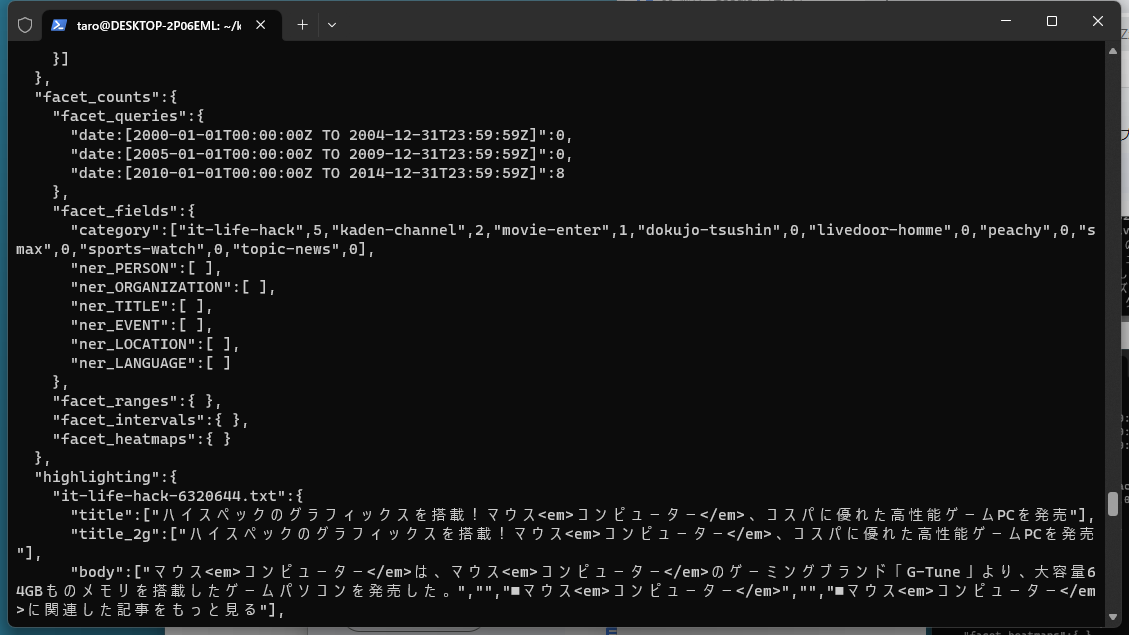
As explained in the previous chapter, in the livedoornews collection, highlighting and faceting are enabled by default, so you can confirm that the response includes information on highlighting and faceting.
curl 'https://proj01-inst01.c.kandasearch.com/solr/livedoornews/select?q=%E3%82%B3%E3%83%B3%E3%83%94%E3%83%A5%E3%83%BC%E3%82%BF%E3%83%BC&rows=10&fl=id,score,title,body,url&hl=true&facet=true&q.op=OR&defType=edismax'
The details of the Apache Solr search API are extensively explained in the Query Guide of theApache Solr Reference Guide. However, here we will introduce the basic search parameters.
Basic search parameters
q
Specify the search keyword. Here are some examples:
# Search for "computer"
q=computer

# Search for "computer" or "server"
q=computer OR server

# Search for "computer" and "server"
q=computer AND server

# Search for documents containing "computer" but not "server"
q=computer NOT server

# Search for containing either "computer" or "server" and also containing "internet"
q=(computer OR server) AND internet
When searching only in specific field names, use a colon : as follows:
# Search only in the title field
q=title:computer

# It's also possible to combine the search expression with field name specification mentioned above
q=title:computer OR body:server

# Search all documents
q=*:*
Additionally, field names are schema-defined in an XML file called managed-schema.xml, which is a type of configuration file in the search engine. You can reference and modify the schema settings from KandaSearch UI's 'Config' or 'File Manager' (if modified, reload the collection to activate the changes).
fl
You specify the field names to be returned as search results separated by commas, like this:
fl=id,title,body,score
Note that to specify field names in the fl parameter, the respective fields must be configured as stored=true in the managed-schema.xml.
Also, the field score specified in the example above is a special field representing the score (relevance between the query and the document). By including score in the fl parameter, you can retrieve the score of the document.
<field name="id" type="string" indexed="true" stored="true" required="true" multiValued="false" />
<field name="title" type="text_ja" indexed="true" stored="true"/>
<field name="body" type="text_ja" indexed="true" stored="true" multiValued="true"/>
Note that the default behavior when not specifying the fl parameter is 'return all stored=true fields'. Requesting fields that are not used (displayed) in the web application can increase network traffic load. Therefore, it is recommended to specify only the necessary field names using the fl parameter.
rows and start
The rows parameter specifies the 'number of documents to be returned at once' as search results. The default is 10. The start parameter specifies 'from which position in the document list to return results'. The default is 0 (return from the beginning of the list). By combining these two parameters, you can implement pagination (paging back) functionality for displaying search result lists in web applications.
# Display the first 10 items in the search result list
rows=10&start=0

# Display the 'next 10 items (page 2)' in the search result list
rows=10&start=10

# Display the 'further next 10 items (page 3)' in the search result list
rows=10&start=20
The above is for the case where there are 10 items per page. If there are 20 items per page, it would be as follows:
# Display the first 20 items in the search result list
rows=20&start=0

# Display the next 20 items (2nd page) in the search result list
rows=20&start=20

# Display the next 20 items (3rd page) in the search result list
rows=20&start=40
Indexing API
Next is an explanation of the indexing APIs.
Indexing
The method of indexing using the KandaSearch interface is explained in the 'Indexing' chapter. However, operations from the interface require manual work, and there are limitations such as a maximum size for uploaded documents.
Therefore, using the API for indexing is a common practice during application implementation.
Notes.
To finalize indexing (document registration, updating, deletion), a commit is necessary.
This can be done by POST XML containing <commit /> or by including the parameter 'commit=true' in the HTTP request when executing the API.
Additionally, commits can be configured to occur automatically based on factors such as the number of documents or time intervals by setting 'autocommit' in the 'solrconfig.xml' file.
Let's index a data file larger than 2 megabytes into the "livedoornews" collection. (Documents cannot be registered via 'REGISTER DOCUMENTS' in KandaSearch due to size restrictions.)
First, add the full version (not mini one) of the livedoor news corpus data from the extension library to your project and download it to your computer.
To do this, click on the jigsaw puzzle icon at the top of the screen and add 'Livedoorニュースコーパス'(DATA) from the extension library to your project.
Move to the project view, and select "Extensions" on the left side. Click "Download" in the "Livedoorニュースコーパス" block from the list to download the data to your computer.
Unzip the downloaded ZIP file and copy the JSON files to a folder accessible from the terminal app.
Before indexing, use the following command to delete all registered documents (also specify the commit option). Please replace 'your-subdomain of instance', 'your-project', and 'your-collection' in the URL with the appropriate values for your environment.
curl -X POST 'https://proj01-inst01.c.kandasearch.com/solr/livedoornews/update?commit=true' -H 'Content-type:text/json;charset=utf-8' --data-binary '{"delete":{"query":"*:*"}}'
Pay attention to the JSON data being sent with this command.
{
  "delete":{
    "query":"*:*"
  }
}
In the search engine used by KandaSearch, document deletion is performed with JSON representation as shown above. Inside the 'delete' field, the query value represents the query used to identify the documents to be deleted. In the example above, "*:*" is specified, so all documents will be deleted.
Notes.
To delete a specific document, for example, a document with the ID "dokujo-tsushin-4778030.txt", you specify it as follows.
{
  "delete":{
    "query":"id:dokujo-tsushin-4778030.txt"
  }
}
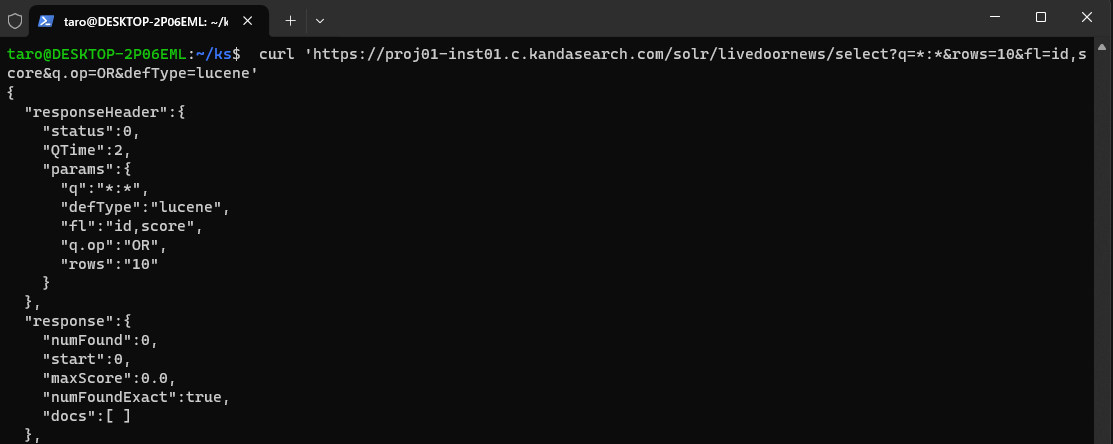
Once you have executed the command to delete all documents, you can then execute the following command to confirm that all documents have been deleted (look for the "numFound":0 section).
curl 'https://proj01-inst01.c.kandasearch.com/solr/livedoornews/select?q=*:*&rows=10&fl=id,score&q.op=OR&defType=lucene'
Once you've confirmed that the index is empty, you can proceed to index using the following command. The JSON file is named livedoor.json. This process may take about a minute to complete.
curl -X POST 'https://proj01-inst01.c.kandasearch.com/solr/livedoornews/update?commit=true&indent=true' --data-binary @livedoor.json -H 'Content-Type: text/json'
Once indexing is complete, execute the aforementioned search API again to confirm that all 7367 documents have been registered. (This is indicated by "numFound":7367.)
Let's also check from the KandaSearch 'Search' UI.
Updating Documents
In the search engine, updating documents is exactly the same as registering new documents.
In the search engine, document registration (or updating) is internally carried out as follows:
- Search for the existing document with the 'unique key' (the value of the "id" field in the case of Livedoor News) of the document being registered (or updated).
- If existing documents are found, delete them.
- Register the document to be registered (or updated) as a new document.
As executed above, updating the content of an existing document in the search engine is exactly the same process as adding a new document.
Notes.
If a unique key is not set, the process described above cannot be executed, making it impossible to update documents. Therefore, it's essential to always set a unique key.
Download the WebApp
What is a WebApp?
To access the search engine created on KandaSearch and display search results, it is common to prepare a web application on a web server. This is what we call a WebApp.
In the 'Search' screen of KandaSearch's instance view, you can download a Java client (using Spring Boot) that acts as a web application containing the query when searching according to the conditions set in the left pane.
Application developers can efficiently progress with WebApp development by understanding the access methods from the application based on this code, and making adjustments such as design.
Here, we'll use the Java installed on Mac's Terminal or Windows PC's WSL to execute the downloaded WebApp from the computer's browser. The collection used is livedoornews.
Download the WebApp
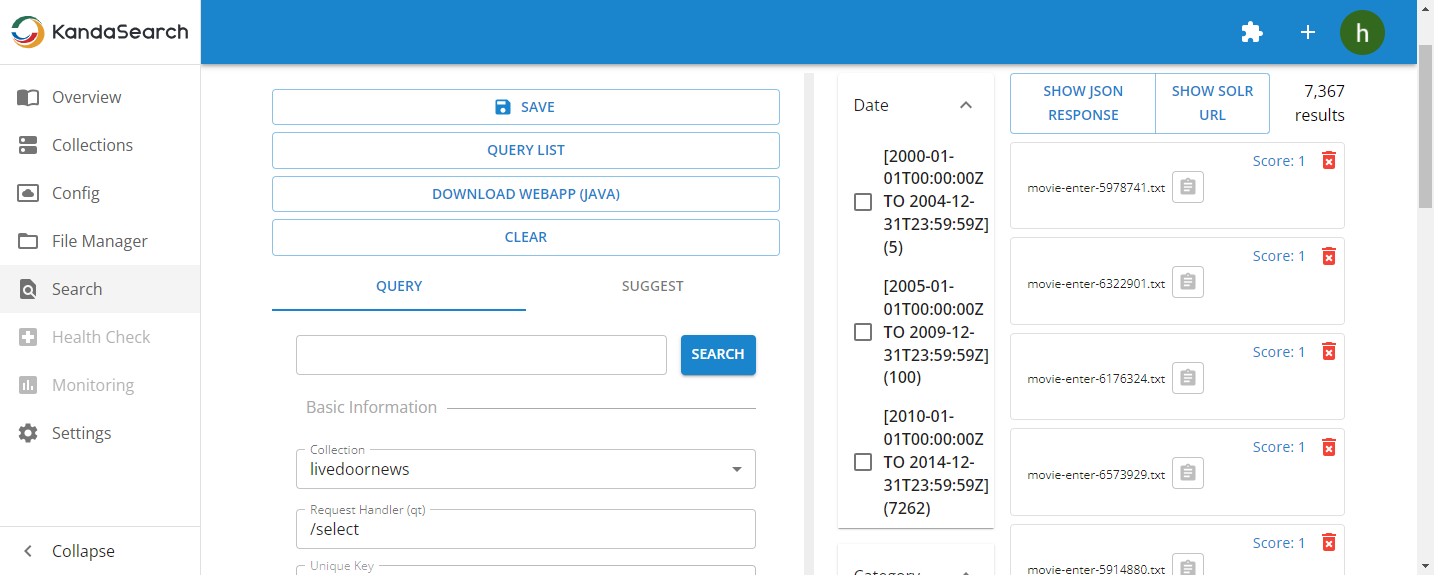
Select 'Search' on the left side of the instance view, and perform a search by loading saved queries and other actions from the previous tutorials.
Next, click on 'DOWNLOAD WEBAPP (JAVA)' at the top of the left pane and wait for the download to complete. (Please do not close the browser until the download is complete.)
Unzip the downloaded ZIP file on your computer and copy it to any folder accessible from the terminal app.
Also, please read the "README.md" file in the extracted folder beforehand, as it contains important information about usage and precautions.
Running the WebApp
Move to the terminal window and navigate to the directory where you copied the Java application using Linux commands.
Run the following command.
If necessary, replace 'jar_file_name' with the name of the file you downloaded.
Also, make sure that your computer's originating IP address is registered in the instance's allowed IP list.
java -jar ks-search-client-1.1.4.war
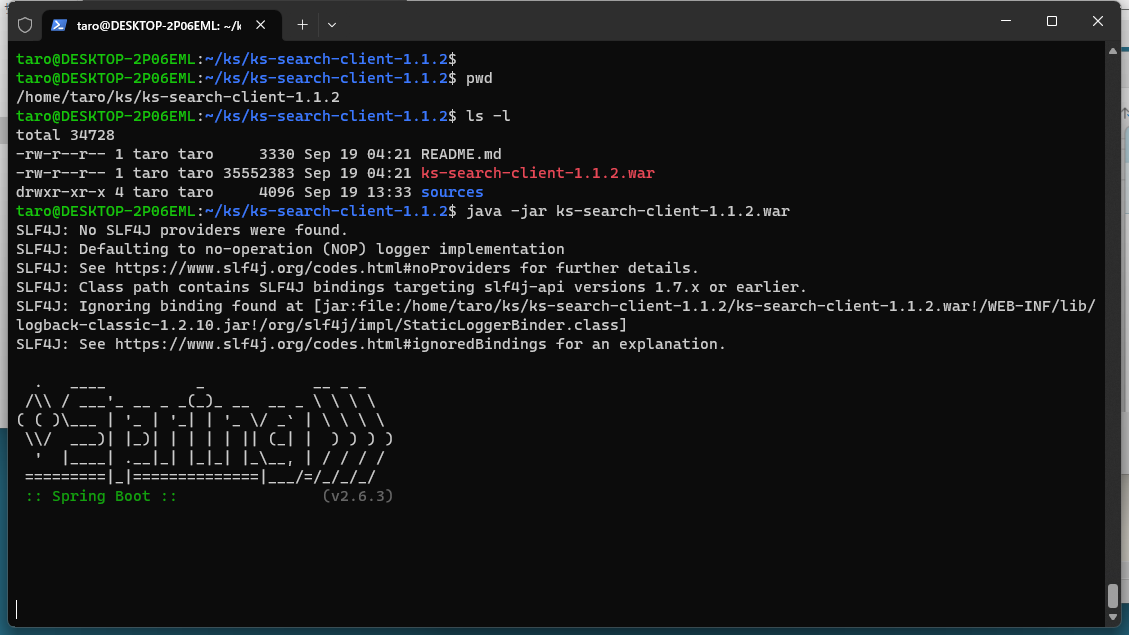
Please keep the terminal window displayed as shown in the above figure, and enter the following URL in the address bar of your browser to access the WebApp running on your computer.
http://localhost:9090
If the WebApp is functioning properly, it will send search requests to KandaSearch, format the returned responses, and display a screen like the following.
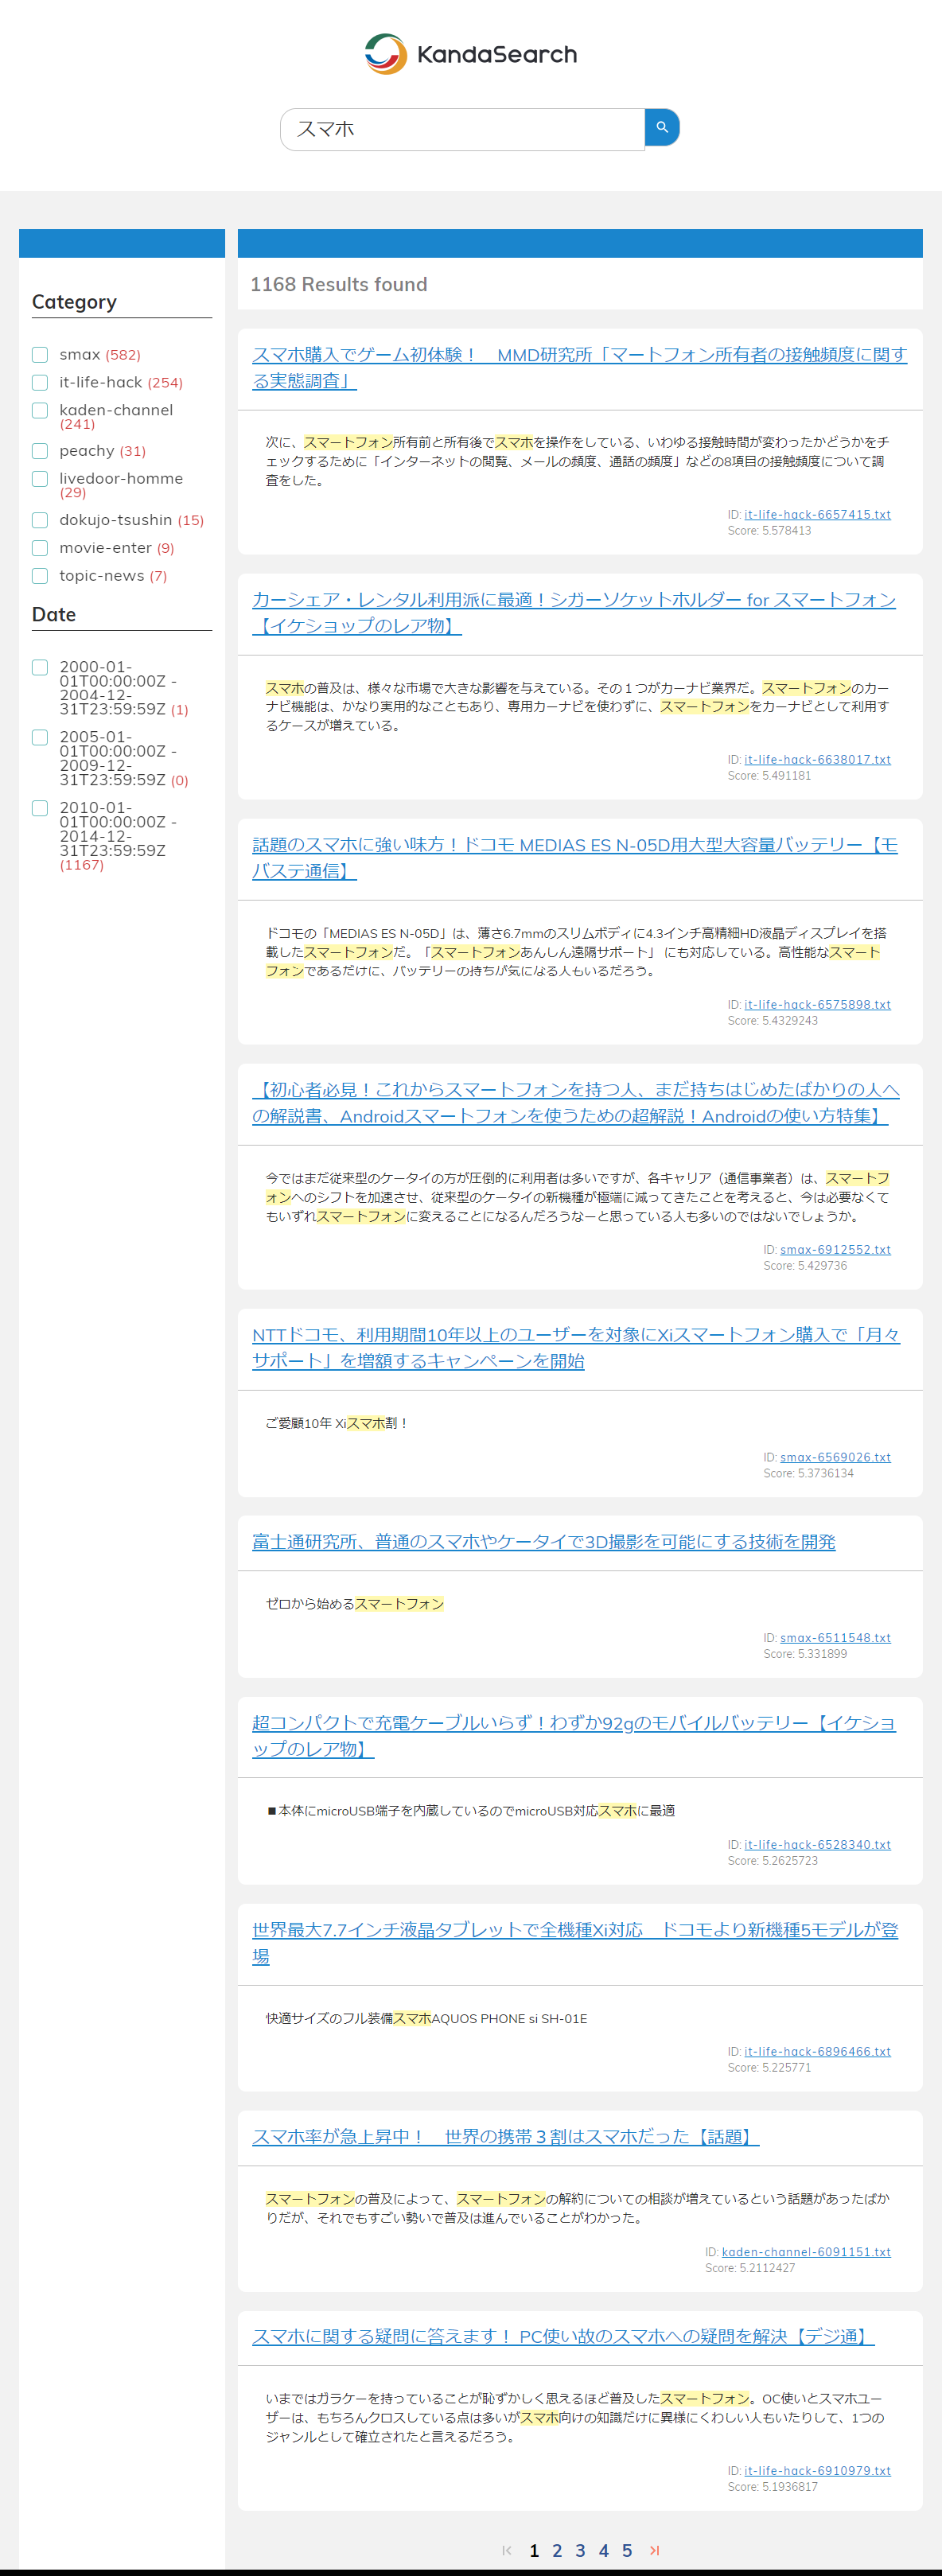
Let's try entering keywords into the 'Enter your search terms here' field to test if you can perform searches using the KandaSearch search engine through the WebApp.
To terminate the Java WebApp, input Ctrl+C in the terminal window.