
TUTORIAL
07. Operational features of KandaSearch
On this page
- Backup and Restore
- Health Check
- Monitoring
- Virus Check
- Setting of alloed IP address ranges
- Standalone Solr and SolrCloud
KandaSearch has convenient features to assist in the operation of the search engine, and here are some of them.
You can find detailed information about each feature in the Document.
Backup and Restore
You can manually or automatically backup indexes and configuration files. Additionally, you can restore from backed-up data.
Backup and restore are management items for the project.
The available storage capacity for backups varies depending on your subscription plan. Please check the specifications of each plan on the pricing page.
Backup
Let me explain about backup.
There are two types of backup methods: 'NOW (Manual)' and 'SCHEDULED (Automatic)'.
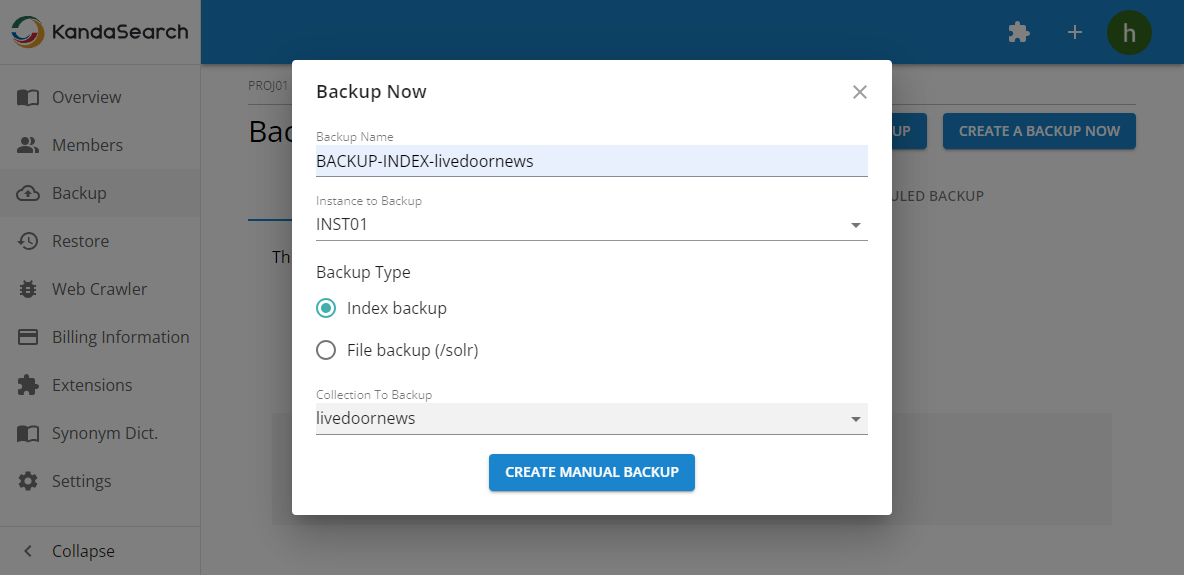
To manually perform a backup, select 'Backup' from the left side of the project view, then click 'CREATE A BACKUP NOW' on the backup screen.

Specify the backup name and select the instance.
When selecting 'Index Backup' as the backup type, choose the collection(s) to be backed up.
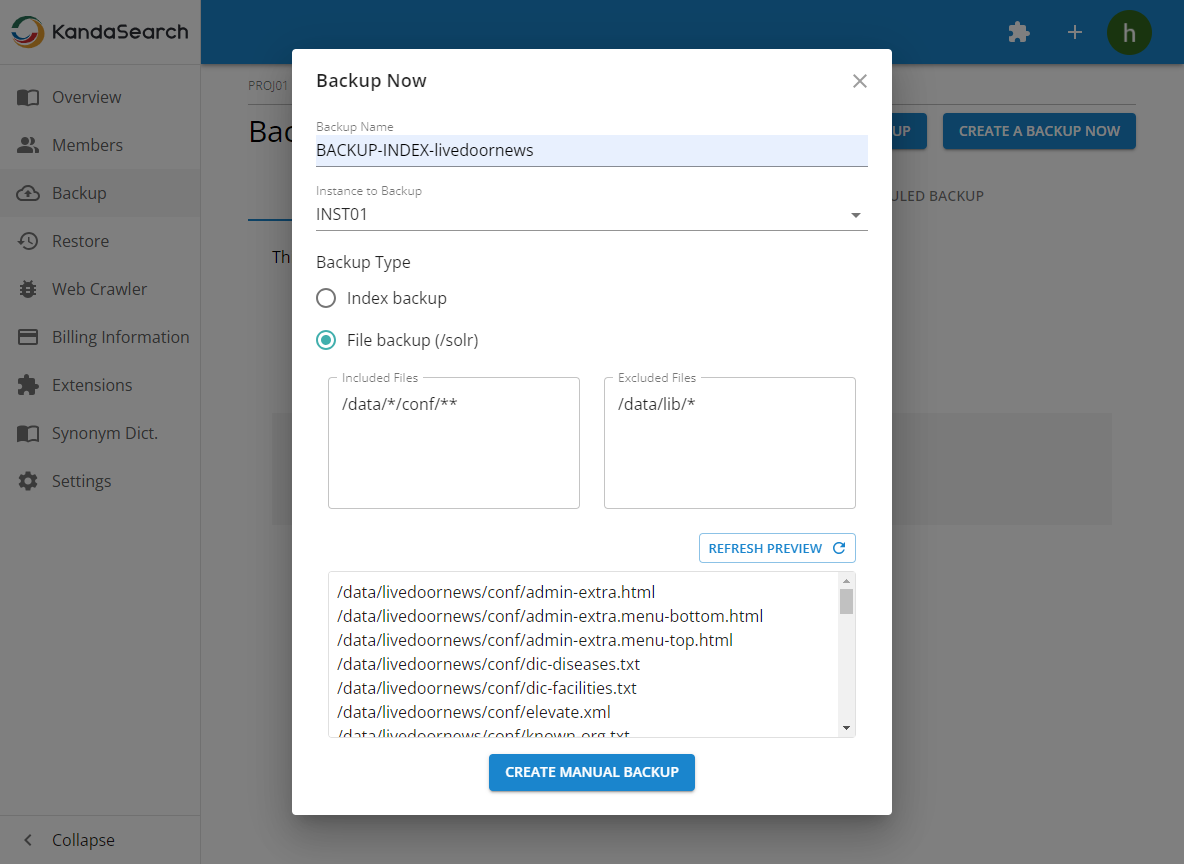
When selecting 'File Backup' as the backup type, after selecting the collection(s) to be backed up, specify the target file names for 'Included Files' and 'Excluded Files'. After specifying, be sure to click 'REFRESH PREVIEW'.
By narrowing down the scope, you can save storage space.
Once each specification is completed, click 'CREATE MANUAL BACKUP'.
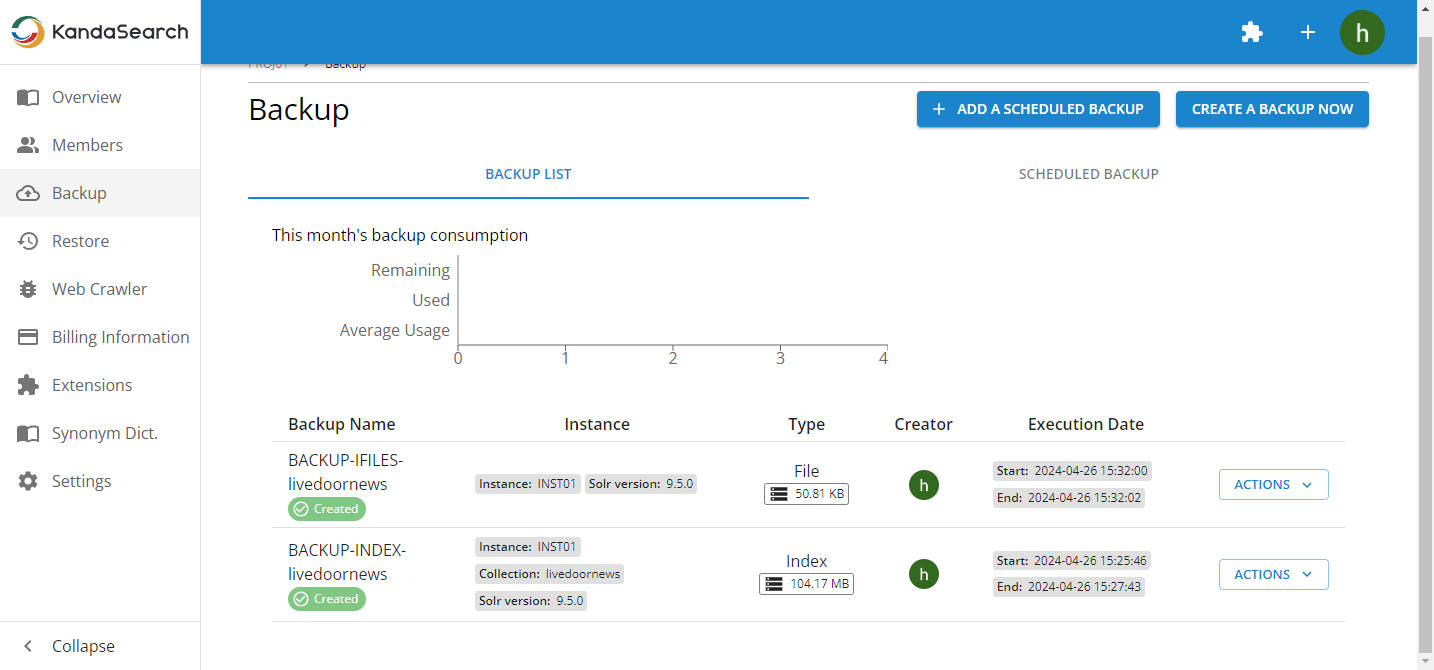
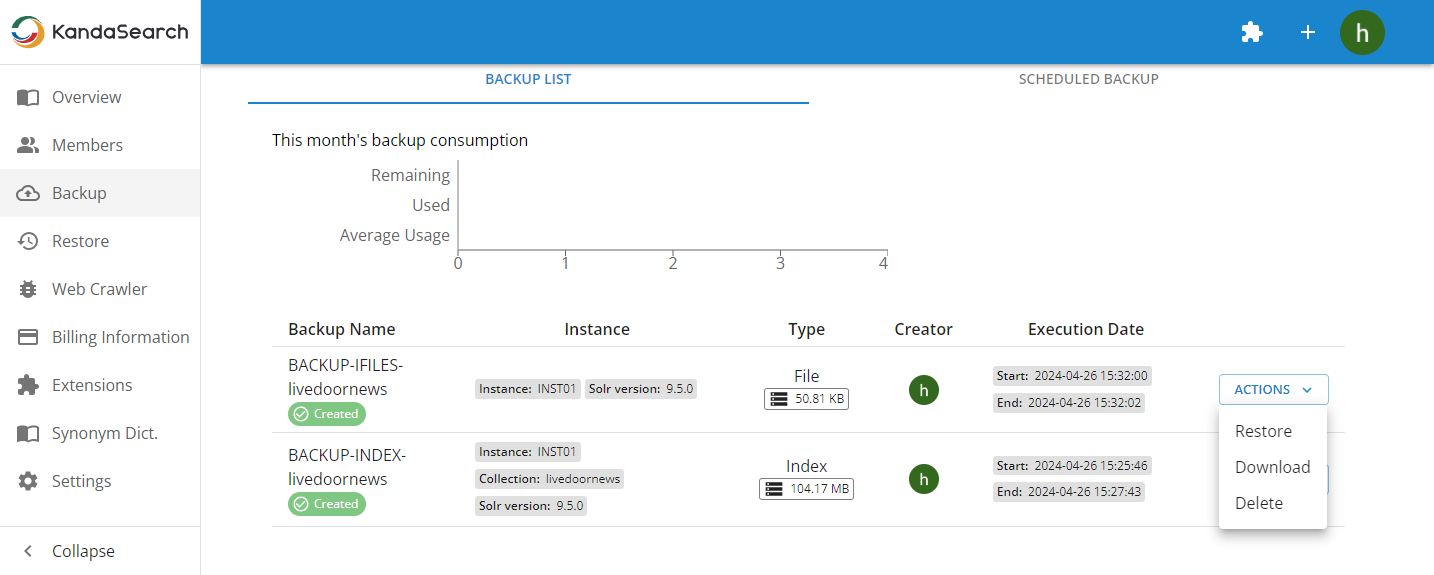
The backup screen displays the created backup jobs, allowing you to check their status and other details.
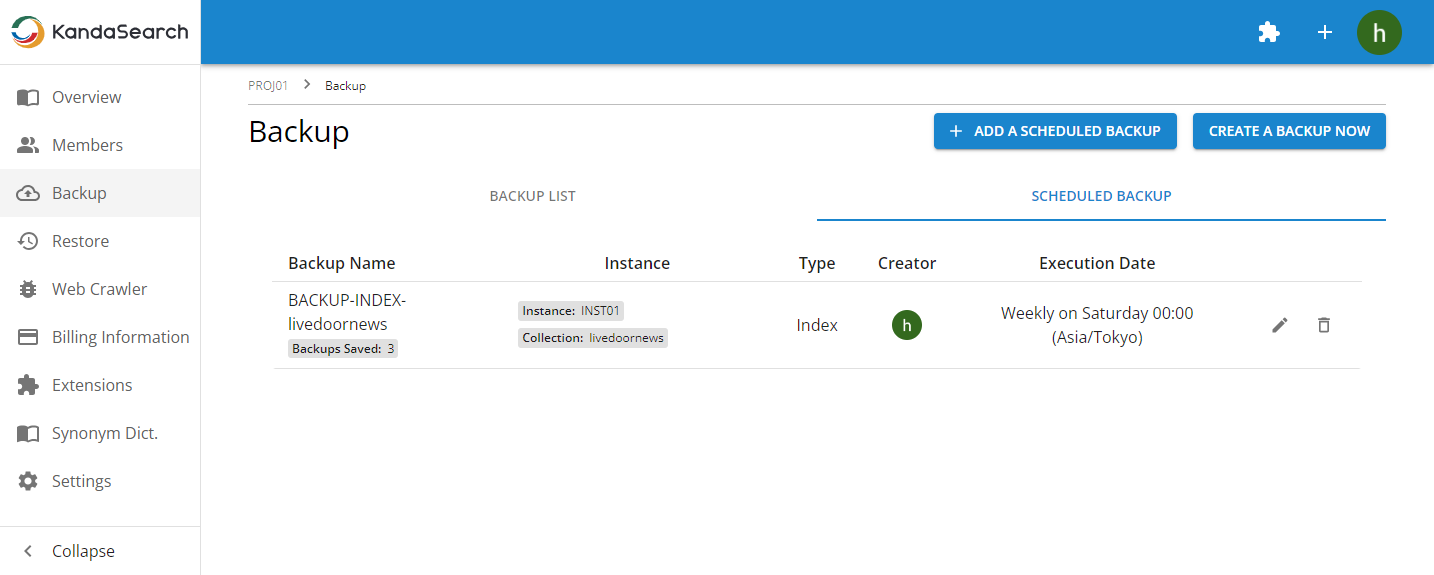
If you want to take backups automatically at regular intervals, click on 'ADD A SCHEDULED BACKUP'.
In addition to the items specified during manual backup, you will specify the backup schedule and the number of backups to retain.
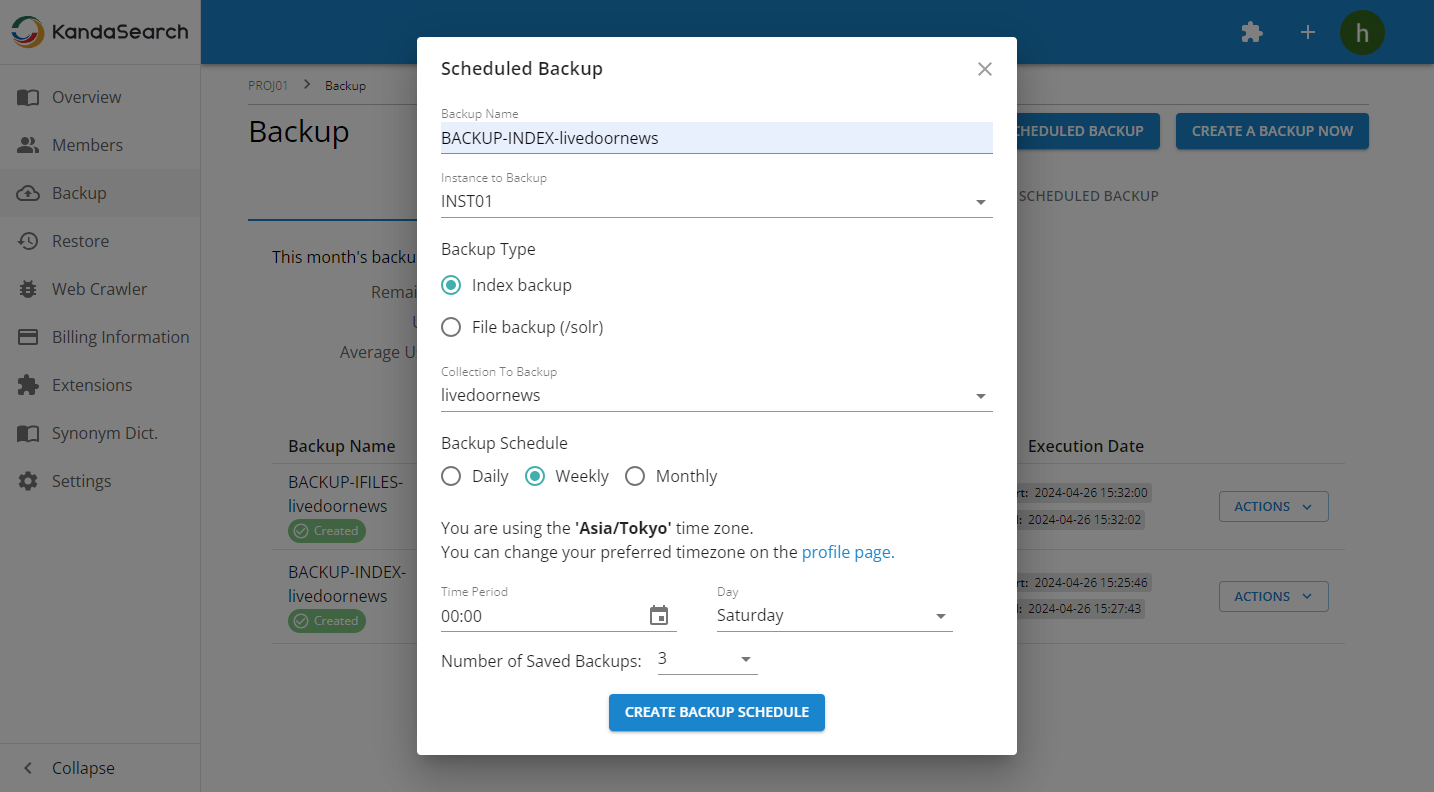
Once each specification is completed, click on 'CREATE BACKUP SCHEDULE'.
The settings for scheduled backups can be modified by clicking on the 'SCHEDULED BACKUP' tab and editing the target row from the list displayed (using the pencil icon). Additionally, you can delete them by using the delete icon (trash can icon).
IMPORTANT
For paid plans, if the storage capacity used for backups exceeds the free quota of your plan, the excess amount will be added to your invoice as usage-based charges.
For the Community plan, backups exceeding the free quota cannot be executed.
Please regularly check the backup screen to monitor backup usage.
Restore
Next, let's explain about restoration.
To perform a restore, first locate the backup data to be used for restoration from the backup list.
Click on the 'ACTIONS' at the right end of that row, and select 'Restore'. This will bring up a confirmation screen for the type of restoration.
After selecting the destination 'instance' or 'collection (if restoring an index)', click 'RESTORE' to initiate the restoration process.
When restoring, please be careful not to make a mistake in specifying the destination for the restoration.
Once the preparation for the restoration process has started, it cannot be undone.
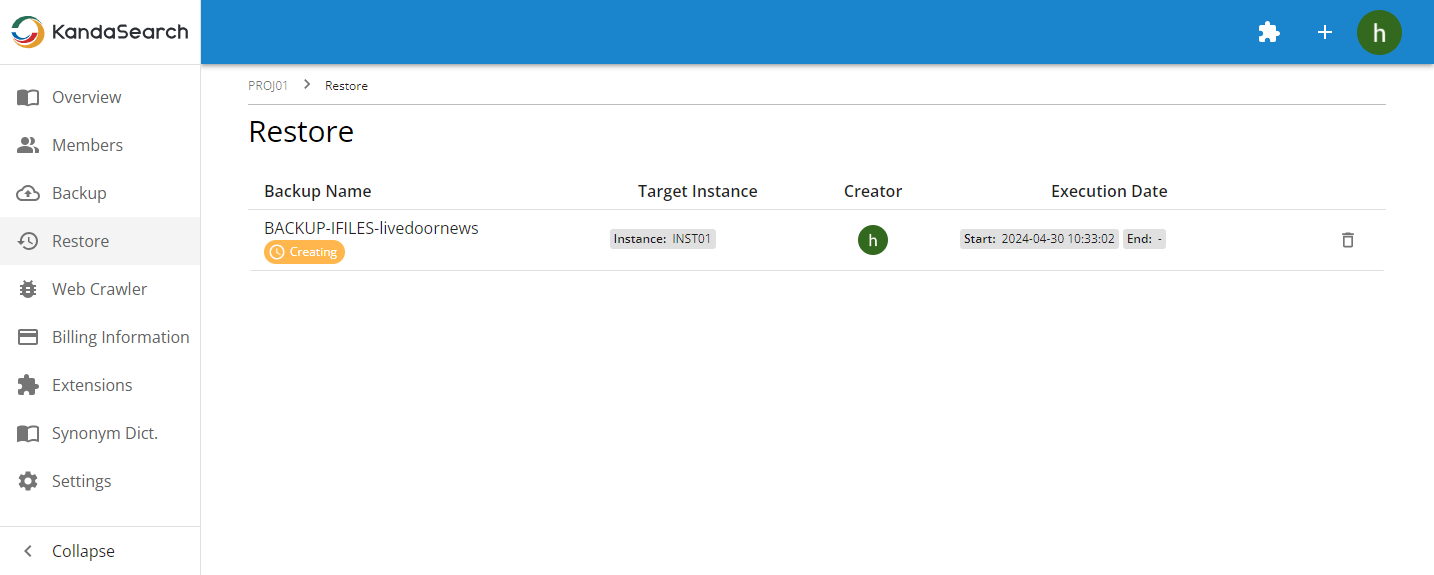
You can check the status of the restoration process at any time.
Select 'Restore' from the left side of the project view and check the status. If the status is displayed as 'Created', the restoration is complete.
Deleting Backups
Deleting Backups
You can reduce the usage of instance storage by deleting unnecessary backups.
To delete a backup, click on the 'ACTIONS' button at the right end of the row corresponding to the backup you want to delete in the backup list on the 'Backup' screen, and select 'Delete'.
IMPORTANT
Deleting a search engine instance also deletes the backup data.
Health Check
In health checks, instances are monitored using the search engine's PING feature. When a failure occurs, users can receive notifications through their specified methods.
The health check feature is available in plans Standard and above.
Enable or Disable Health Check
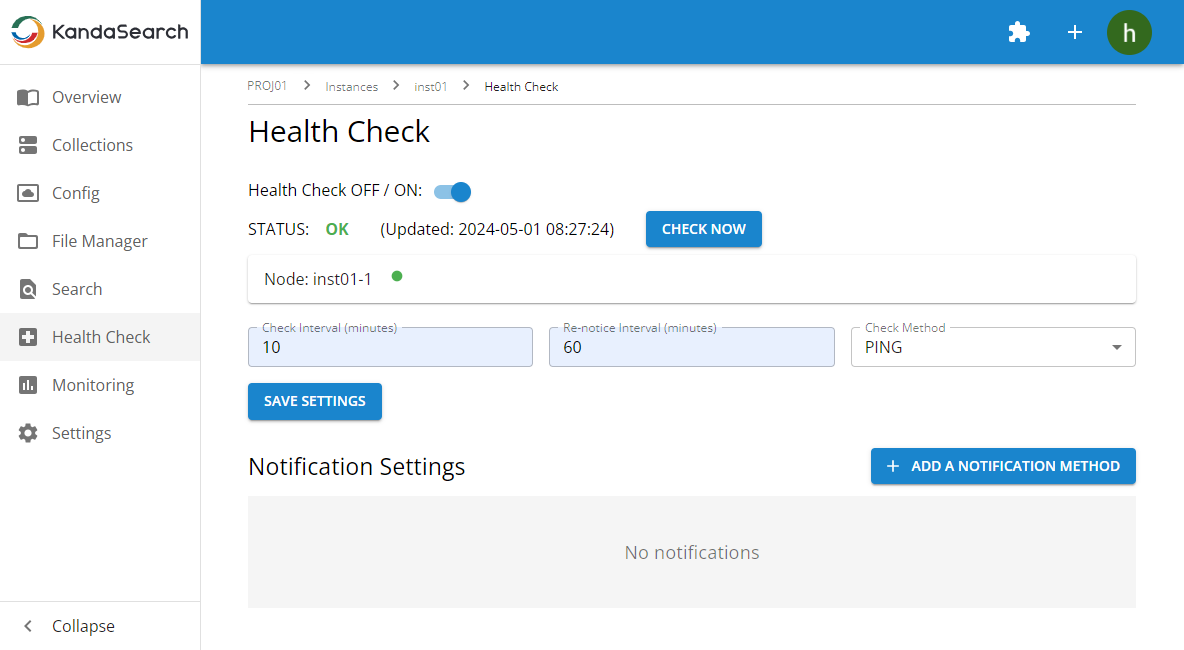
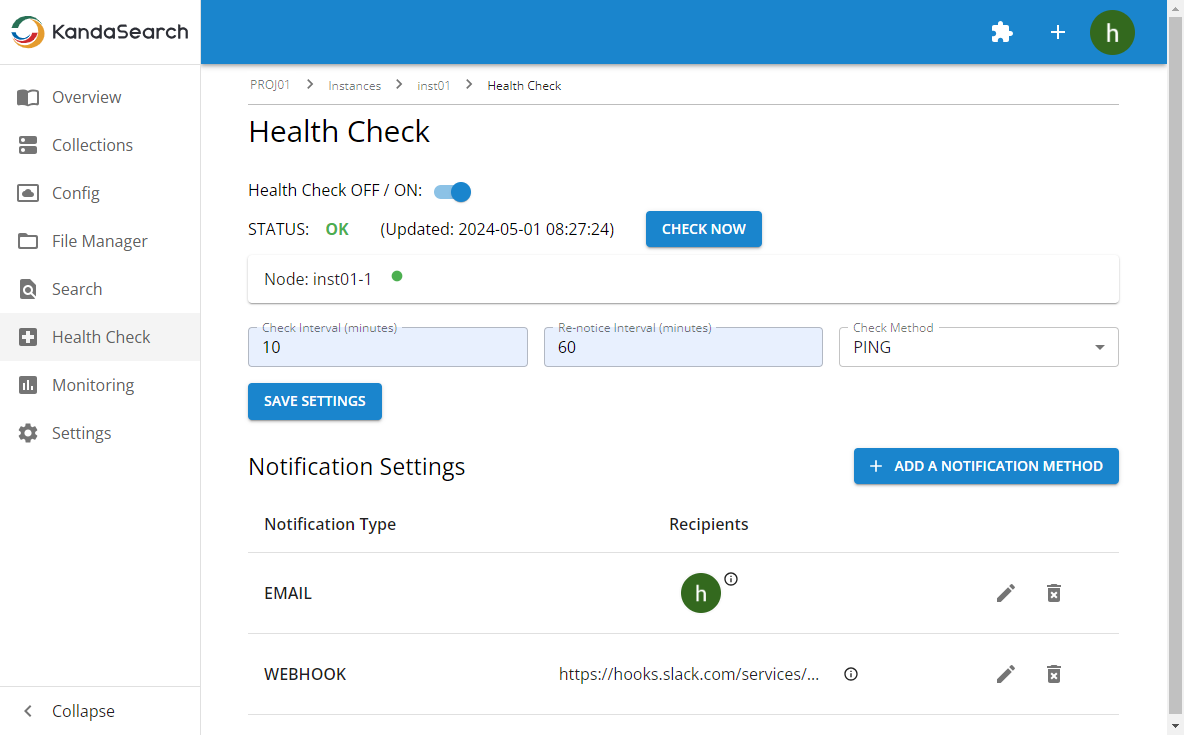
To configure health check settings, select 'Health Check' from the left side of the instance view.
If 'Status Settings' are not defined, specify the check interval, re-notification interval, and check method, then click 'SAVE SETTINGS'.
Once Checking begins with the configured conditions, the 'STATUS' column will display the status and update time.
Clicking 'CHECK NOW' will immediately perform a status check and update the display.
To stop checking, slide the switch to the left to turn 'Health Check OFF/ON' off.
If you want to change the checking conditions, modify each item such as the check interval, and then click "SAVE SETTINGS" after making the changes.
Notification Settings
Next, we will configure the notification settings.
Click on '+ ADD A NOTIFICATION METHOD'.
As notification methods, you can use 'Email' and 'Webhooks like Slack' (both can be used simultaneously).
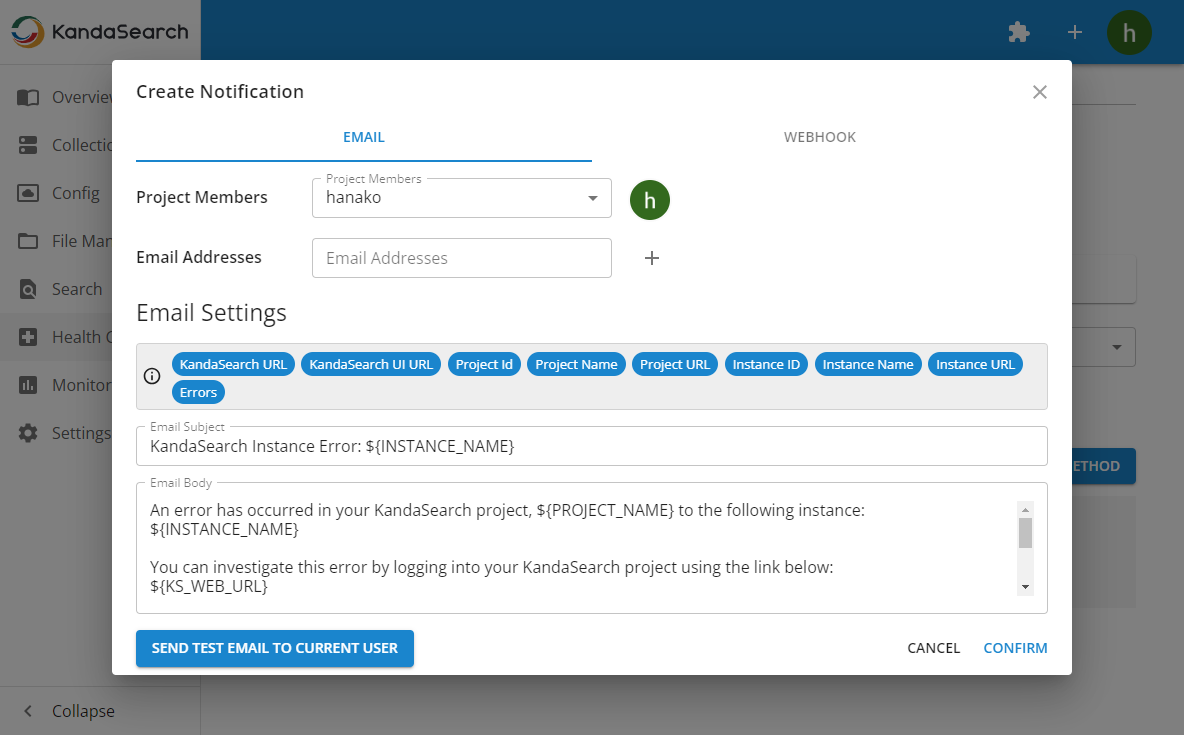
When sending notifications via email, go to the 'EMAIL' tab and specify the project members or email addresses (after entering the email address, be sure to click the '+' icon), email subject, and email body. Then click 'CONFIRM'.
The subject and body fields use a placeholder format, allowing customization by dragging and dropping items to any position.
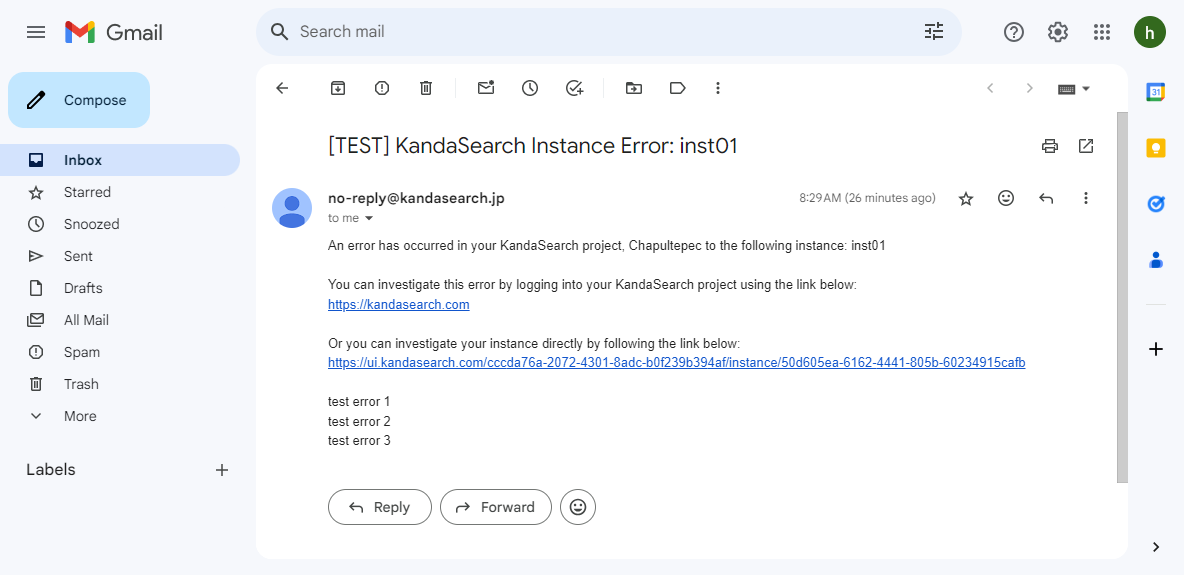
Clicking 'SEND TES EMAIL TO CURRENT USER' allows you to send a test email.
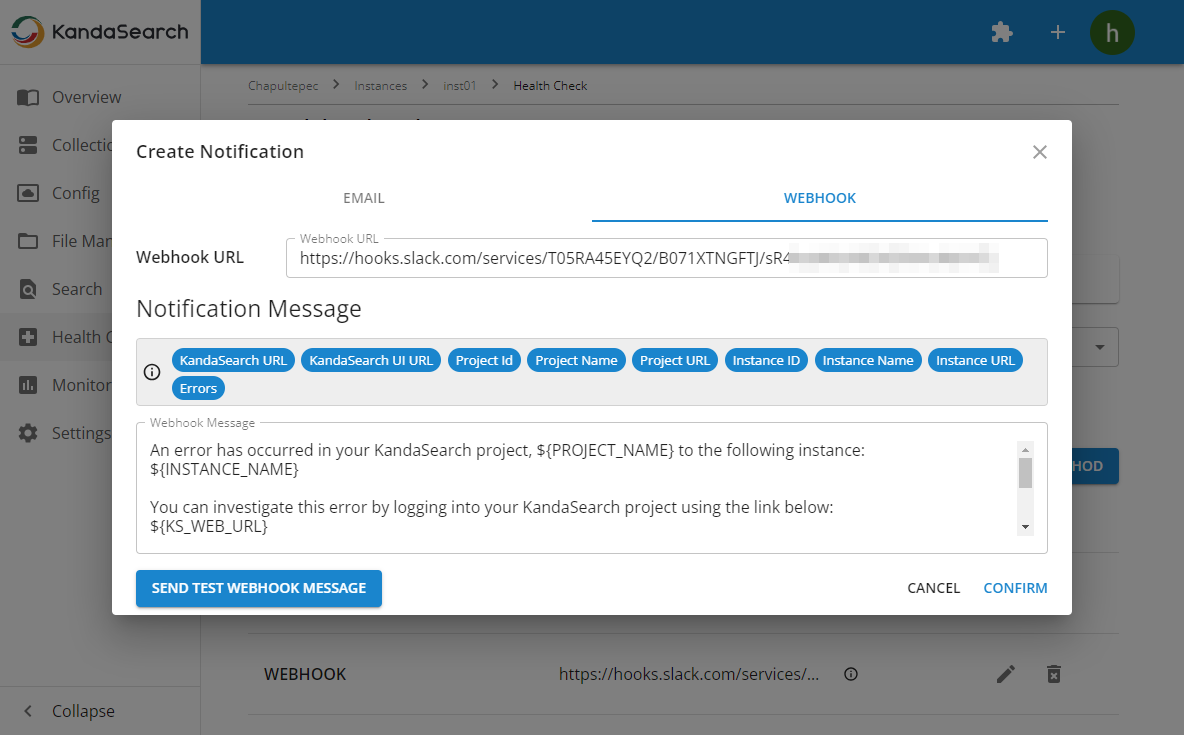
When sending notifications via webhook, go to the 'WEBHOOK' tab, enter the webhook URL, specify the webhook message, and click 'CONFIRM'.
The webhook message field uses a placeholder format similar to the email method, allowing customization by dragging and dropping items to any position.
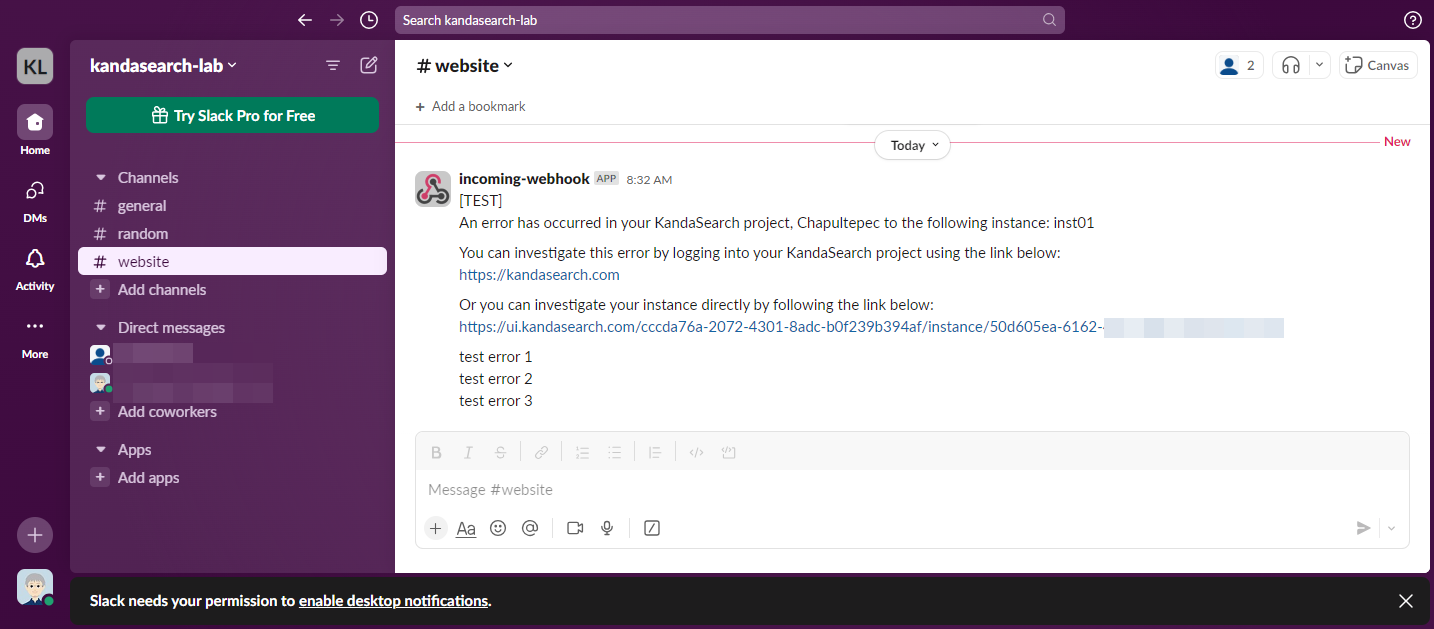
Clicking 'SEND TEST WEBHOOK MESSAGE' allows you to send a test webhook.
Notification settings can be created for each method multiple times.
In the list of notification settings, you can edit (pencil icon) or delete (trash can icon) settings for a specific row.
Monitoring
The 'Monitoring' feature is a function that allows KandaSearch to monitor the usage status of server resources on nodes where the search engine is running, by retaining this information for a certain period. This enables users to check the resource status from the KandaSearch management interface at any time.
The storage of usage data for server resources used in monitoring starts automatically upon instance creation.
The monitoring feature is available for plans Standard and above.
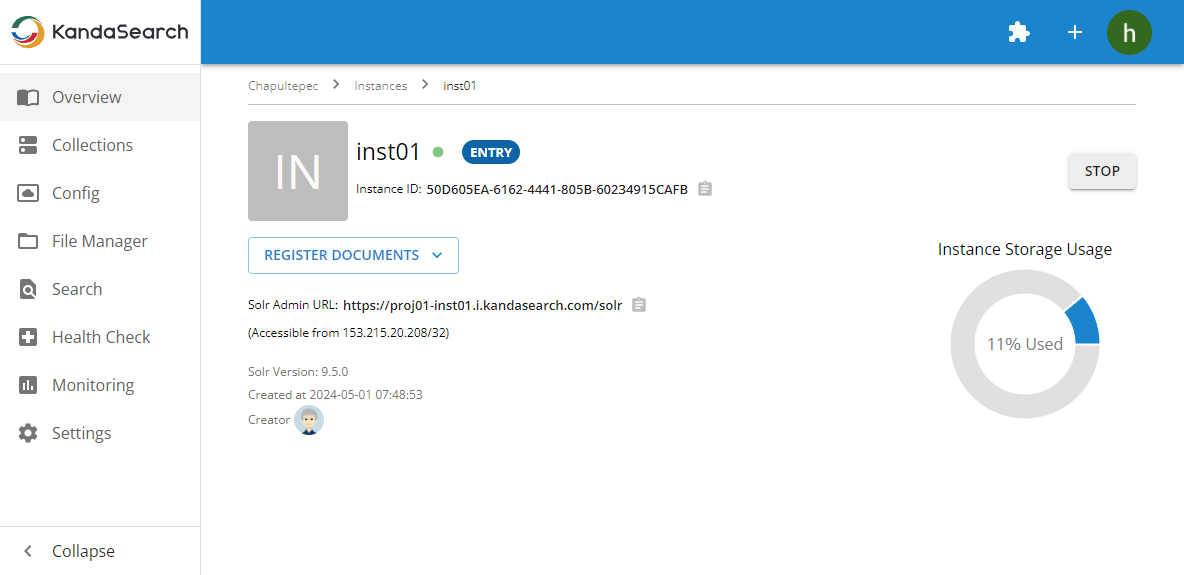
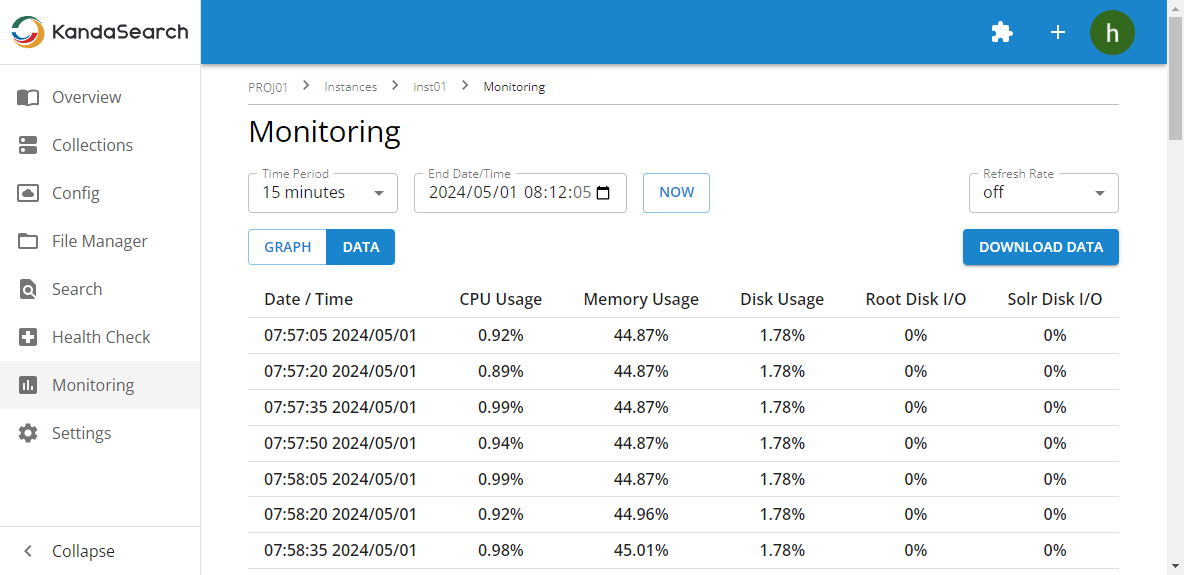
To use monitoring, select "Monitoring" from the left side menu in the instance view.
The monitoring targets are CPU usage (%), memory usage (%), disk capacity usage (%), and disk I/O (%).
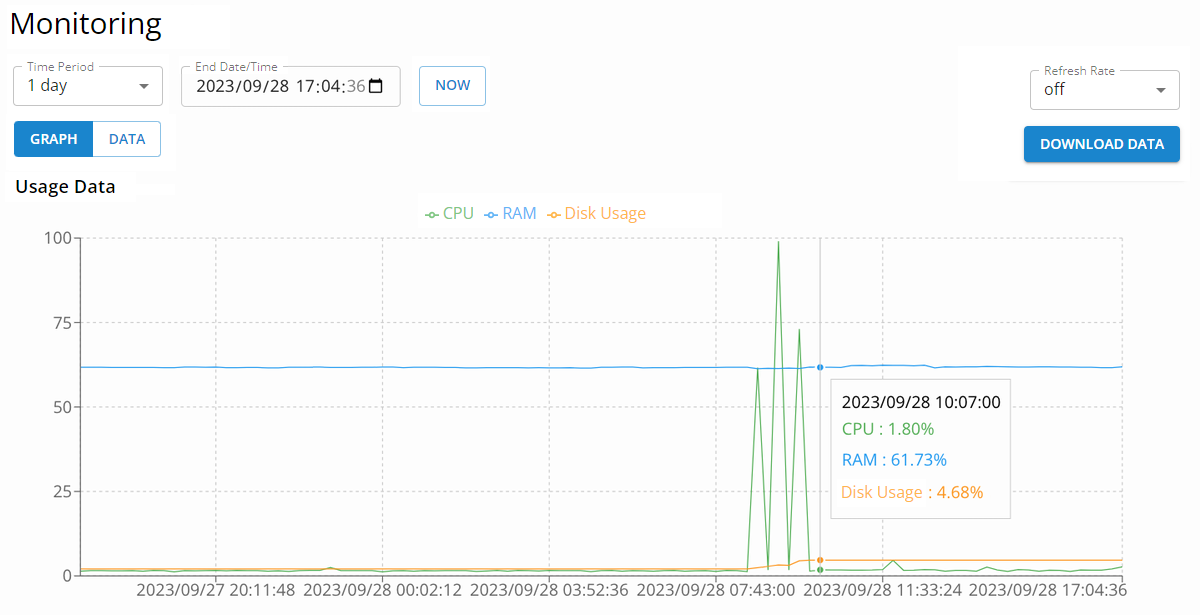
In the monitoring screen, the following operations are possible:
- You can specify the 'Time Period' and 'End date/time' of the displayed data. For example, if you set "End date/time" to '2023/10/13 15:00' and 'Time Period' to "1 hour", data with 15-second intervals from 14:00 to 15:00 on October 13, 2023 will be displayed.
- You can choose between 'GRAPH' and 'DATA' for the display format. Click the button for each display format to specify.
- By specifying the interval time in 'Refresh rate', the display will be automatically updated at the specified interval.
- Clicking 'DOWNLOAD DATA' allows you to download the displayed data.
- Clicking on 'CPU', 'RAM', 'Disk Usage', 'Root Disk I/O', or 'Solr Disk I/O' at the top of the graph allows you to control the visibility of the corresponding line in the graph.
Virus Check
KandaSearch has a virus check feature that scans files under the Solr directory of the instance and removes viruses.
The virus check feature is available for plans Standard and above.
To enable virus scanning, go to the 'Settings' on the left side of the instance view and turn on 'Virus Scan'.
By conducting virus checks, you can use KandaSearch more securely.
Recently, there has been an increase in the level of IT security required by companies, and system development that requires implementation of security measures on all servers is becoming more common. If you need to meet such specifications, please consider using this virus scanning feature.
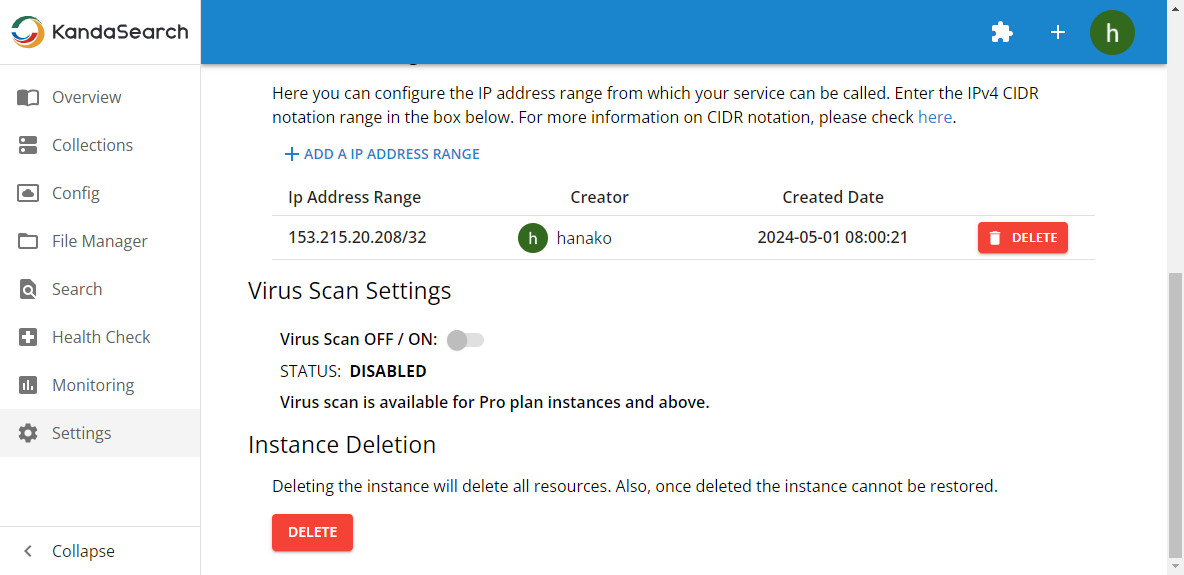
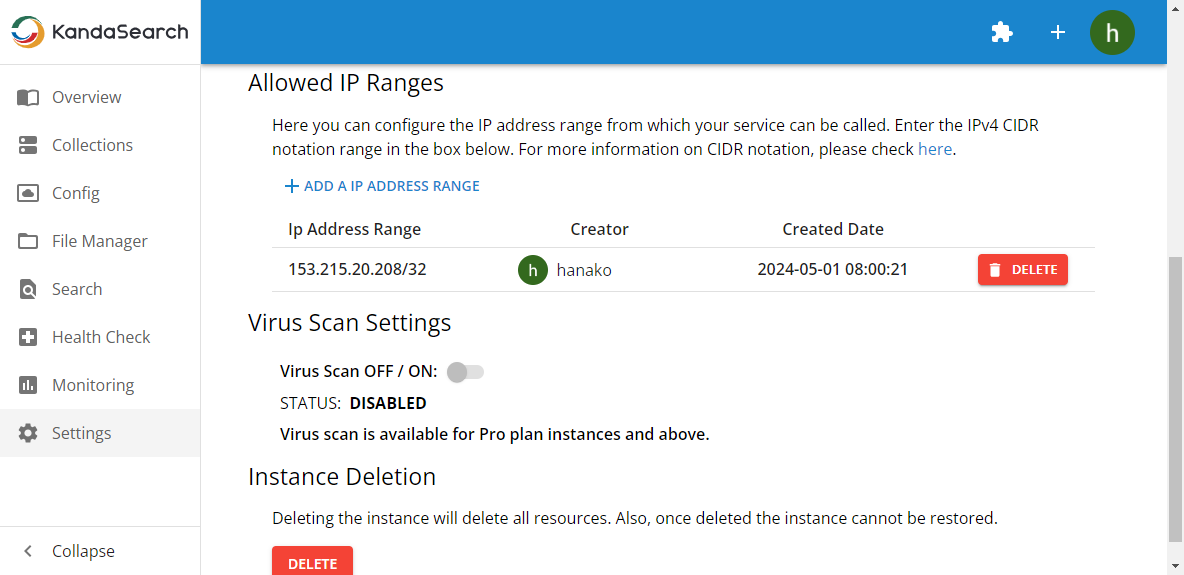
Setting of alloed IP address ranges
To access the KandaSearch instance from the internet, you need to pre-register the IP addresses of the connecting servers, computers, etc.
This blocks access from third parties to the search engine, allowing you to use KandaSearch with confidence.
To configure the permission settings for IP address ranges, select 'Settings' from the left side menu in the instance view.
Click on '+ ADD A IP ADDRESS RANGE' in the 'Allowed IP address ranges' section and register the IP addresses. IP addresses should be specified in IPv4 CIDR notation.
The range of registrable sets varies depending on the pricing plan.
Once the registration is completed, the creator and creation date/time will be displayed along with the registered IP address range. The display of the creator and creation date/time makes it easier to determine the relevance of each record.
Once the registration is completed, for a PC, you confirm that you can access the Solr Admin URL from the browser.
For a server, you use the curl command to execute search APIs and confirm that a normal response is returned. If "302 Found" continues to be returned even after a few minutes, there may be a possibility that the registered IP address is incorrect.
Standalone Solr and SolrCloud
For a single search system, in a standalone configuration, the search engine is comprised of one server machine, whereas in a SolrCloud configuration, it is composed of multiple servers.
In using SolrCloud, for example, when four nodes (servers) are available, it is conceivable to divide the index into four shards (Shard: a Solr core responsible for one index). By doing so, the load on each server per node due to search processing can be reduced, leading to improved search speed.
Furthermore, by replicating indexes across servers, high availability can be achieved. This allows for continued normal operation of the entire search system even if one server goes down, and enables maintenance to be performed by shutting down one server.
When the search engine is adopted by companies, the SolrCloud configuration is often chosen.
If you are considering using SolrCloud with KandaSearch, please inquire through the Contact form.